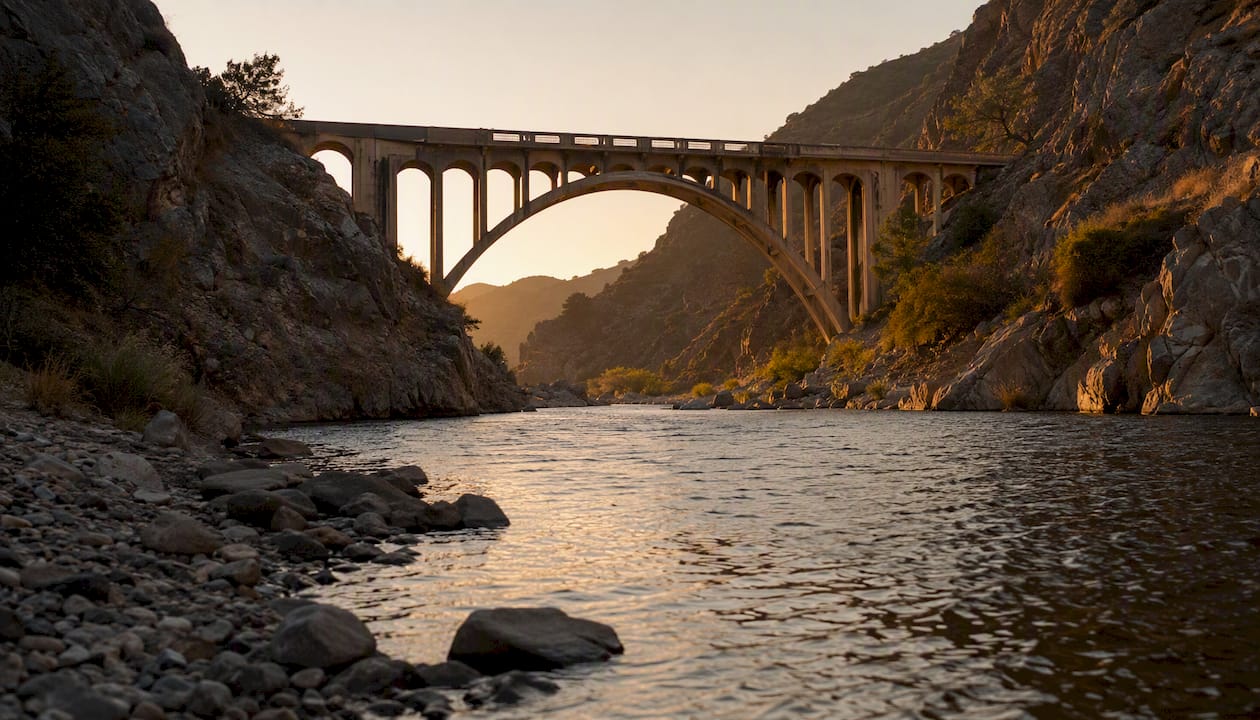
The Bridge to Nowhere hike is a roughly 10-mile out-and-back trail through the East Fork of the San Gabriel River canyon in Angeles National Forest, and it’s one of the most rewarding hidden hiking trails in the Los Angeles area — as long as water levels are safe. If there’s been recent rain or it’s spring runoff season, skip it for now. If conditions are dry and flows are low, this is an absolute must-do.
Quick snapshot:
- Distance: 9.7–10.1 miles round-trip
- Elevation gain: ~1,200–1,250 feet
- Typical time: 4–5 hours
- River crossings: At least 6 (wet feet guaranteed)
- Permit/parking: Adventure Pass or America the Beautiful Pass required
- Difficulty: Moderate to strenuous
⚠️ Flash flood warning: An upstream thunderstorm can raise river flows within minutes. Check the NOAA point forecast before you leave home. If rain is forecast anywhere in the watershed, do not attempt the crossings.
Key Takeaways
The Bridge to Nowhere hike is a 9.7–10.1 mile out-and-back trail with six river crossings that rewards prepared hikers and punishes those who skip the water-level check.
| Point | Details |
|---|---|
| Distance and crossings | 9.7–10.1 miles round-trip with at least 6 river crossings; wet feet are guaranteed. |
| Permit and parking | An Adventure Pass ($5/day or $30/year) is required; arrive by 7:00 AM on weekends. |
| Best season | Late fall (October–November) offers the safest combination of low flows and cool temps. |
| Flash flood risk | Check the NOAA forecast before every trip; turn back if any rain is forecast in the watershed. |
| Leave No Trace | Pack out all waste, obey private inholding signs near the bridge, and report trail damage to SGMTB. |
Table of Contents
- What does the Bridge to Nowhere hike cover, mile by mile?
- Step-by-step route from the trailhead to the bridge
- How do you get to the trailhead and what permits do you need?
- What gear do you actually need for this hike?
- What are the real safety risks on the East Fork trail?
- When is the best time to hike the Bridge to Nowhere trail?
- Trail conditions: who maintains the East Fork and how do you report problems?
- What’s it actually like at the bridge on a weekend?
- How do you navigate when the trail shifts after a storm?
- Pre-hike safety checklist backed by USFS and SAR guidance
- Why the Bridge to Nowhere is worth doing (and when to choose it)
- Sources
What does the Bridge to Nowhere hike cover, mile by mile?
The East Fork Trail is an out-and-back route that follows the San Gabriel River upstream through a narrow, dramatic canyon to a 1936 concrete arch bridge that was never connected to a road. AllTrails lists the route at approximately 9.7–10.1 miles with around 1,240 feet of elevation gain and an average moving time of 4–5 hours.
| Stat | Detail |
|---|---|
| Distance | 9.7–10.1 miles round-trip |
| Elevation gain | ~1,200–1,250 feet |
| Estimated time | 4–5 hours |
| Trailhead | East Fork Day Use / Camp Bonita Road, Azusa |
| Wilderness designation | Angeles National Forest |
| Trail type | Out-and-back |
For maps and GPX files, start with the official U.S. Forest Service East Fork trail page and the AllTrails route page. Both give you downloadable navigation data you can load onto a phone or GPS device before you lose cell service in the canyon.
Step-by-step route from the trailhead to the bridge
The trail is mostly straightforward, but the river crossings and a few unsigned junctions can trip you up. Here’s what to expect at each stage:
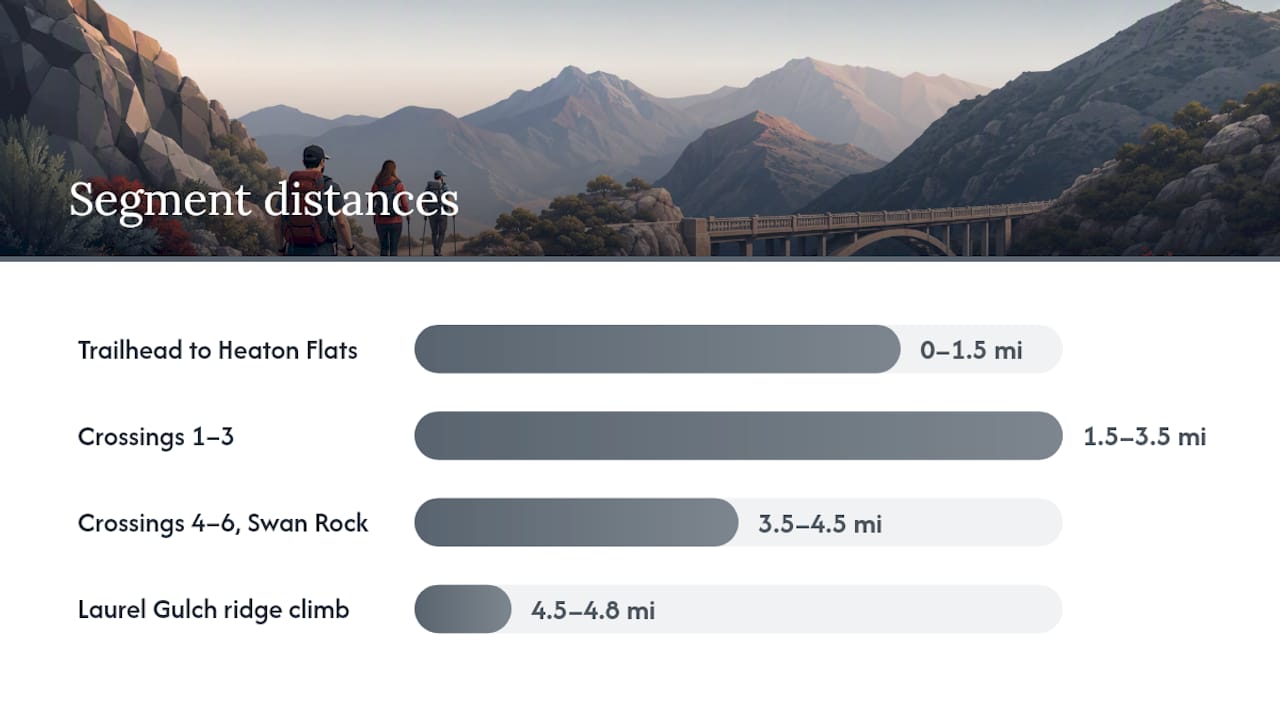
- Trailhead to Heaton Flats (0–1.5 miles): Start at the East Fork Day Use parking area off Camp Bonita Road. The first stretch follows a wide, flat path along the river. Heaton Flats is a popular picnic area and a good spot to check your gear before the canyon narrows.
- Crossings 1–3 (miles 1.5–3.5): The first three river crossings come in quick succession. Depths vary by season but are typically ankle to knee-deep in dry conditions. Unclip your hip belt before every crossing so you can shed your pack fast if you slip.
- Old roadbed at ~3.5 miles: You’ll notice a wide, flat surface that looks almost like a gravel road. Modern Hiker confirms this is the remnant of the original highway project that was abandoned after the 1938 floods. Following it keeps you on route.
- Crossings 4–6 and Swan Rock (miles 3.5–4.5): The canyon walls close in here. Swan Rock is a distinctive white formation on the right bank — a good photo waypoint and a reliable landmark. Crossings 4 through 6 can be deeper and faster than the earlier ones, especially after any rain.
- Laurel Gulch and the ridge climb (miles 4.5–4.8): Just past Laurel Gulch, the trail climbs steeply away from the river. This short but sharp ascent leads to the final approach to the bridge.
- The bridge (mile ~5): The 1936 arch appears suddenly. It’s a genuinely striking structure sitting in the middle of nowhere, which is exactly the point.
Pro tip: Watch for posted signs near the bridge. The structure sits on private inholding land within the national forest, and access is a courtesy granted by the landowner, not a guaranteed public right.
How do you get to the trailhead and what permits do you need?
Getting to the East Fork trailhead is straightforward from the greater Los Angeles area. Take the I-210 to Azusa Avenue (exit 39B), head north through Azusa, and follow East Fork Road (also called San Gabriel Canyon Road) into the canyon. Turn right on Camp Bonita Road and follow it to the East Fork Day Use parking area.
Parking and permits:
- An Adventure Pass ($30/year or $5/day) is required for parking in Angeles National Forest. The America the Beautiful Annual Pass ($80/year) also covers day-use parking here.
- Display your pass on your dashboard — rangers do check, and fines are real.
- Overnight camping requires a wilderness permit, which you can self-issue at the trailhead register. For any reserved or fee-based overnight sites, check Recreation for current availability and rules.
- On weekends, the lot fills by 8:00 AM in summer. Arrive by 7:00 AM or earlier. Roadside parking outside the designated area draws tickets.
The USFS East Fork parking page has current fee information and any temporary closures worth checking before you drive out.
What gear do you actually need for this hike?
The multiple stream crossings and exposed canyon sections change the gear calculus compared to a typical day hike. Pack light but pack smart.
Core essentials:
- Water: Carry at least 3 liters. There’s no potable water along the route, and the river water requires treatment before drinking.
- Food: High-calorie snacks for 4–5 hours of moving; a full lunch if you plan to linger at the bridge.
- Sun protection: The canyon offers shade in sections, but the open stretches get intense, especially in summer. Sunscreen, a hat, and UV-protective layers matter.
- Headlamp: If you start early or run late, you’ll want one.
- First aid kit: Include blister care, an elastic bandage for ankle support, and any personal medications.
Footwear options:
| Option | Best for | Tradeoff |
|---|---|---|
| Quick-dry trail runners | Most hikers; fast crossings | Less ankle support |
| Rugged trail sandals | Warm weather; frequent waders | Less foot protection on rocks |
| Waterproof hiking boots | Cold weather; rocky terrain | Stay wet longer after crossings |
The HikingGuy guide recommends quick-dry trail runners for most conditions. Many regulars walk straight through the crossings rather than stopping to change shoes.
Pro Tip: Wear quick-dry trail runners with vented socks and walk through the crossings without stopping. Changing shoes at every crossing wastes time and actually increases blistering on a 10-mile day.
Balance and safety gear:
- Trekking poles make a real difference at the crossings. Plant them upstream and move one point of contact at a time.
- A dry bag or pack cover protects your phone, wallet, and extra layers.
- A satellite messenger (Garmin inReach or SPOT) is worth carrying. Cell service disappears in the canyon.
What are the real safety risks on the East Fork trail?
The East Fork canyon is beautiful and it can also be genuinely dangerous. HikingGuy’s guide is direct about this: crossing fast-moving water is life-threatening, and several fatal incidents have occurred on this route historically.
Primary hazards and how to manage them:
- Flash floods: The canyon’s narrow geometry means an upstream storm can send a wall of water through before you see a cloud overhead. Check the NOAA forecast the morning of your hike. If there’s any precipitation in the forecast for the San Gabriel watershed, turn around.
- Fast water at crossings: If the water is above your knee, visibly turbid, or moving faster than a brisk walk, do not cross. Wait and reassess, or turn back. No view is worth a swept crossing.
- Extreme heat: Summer temperatures in the canyon regularly exceed 95°F. Start before 7:00 AM, carry extra water, and know the signs of heat exhaustion.
- Slippery rocks: River rocks are coated in algae. Move slowly, test each step, and use poles.
- Poison oak: It lines sections of the trail, especially near the water. Wear long pants or at least know what it looks like.
If someone is swept:
Stay calm, do not jump in after them. Throw anything that floats. Move downstream to intercept. Once safe, call 911 or activate your satellite messenger. The nearest assistance point is back at the East Fork Day Use parking area, where rangers are sometimes stationed. Cell service typically returns near the trailhead.
When is the best time to hike the Bridge to Nowhere trail?
Season matters more on this hike than almost any other trail near Los Angeles. The crossings that make it memorable are the same ones that make it dangerous at the wrong time of year.
| Season | Conditions | Recommendation |
|---|---|---|
| Late fall (Oct–Nov) | Cooler temps, lower flows | Best window overall |
| Winter (Dec–Feb) | Cold; storms raise flows fast | Go only on clear, dry stretches |
| Spring (Mar–May) | Snowmelt runoff; high water | Avoid unless flows are confirmed low |
| Summer (Jun–Sep) | Hot; lower flows but heat risk | Early morning starts only |
AllTrails reviewers consistently recommend late fall through early winter for the best combination of manageable flows and comfortable temperatures. Summer works if you’re out by noon, but the heat is no joke.
On weekends, the bungee jumping operation at the bridge draws extra crowds. A sunrise weekday start gives you the canyon almost to yourself and avoids the midday heat.
Trail conditions: who maintains the East Fork and how do you report problems?
The East Fork canyon is a dynamic environment. Storms regularly wash out sections of trail, shift the river channel, and deposit debris across the path. What you see on a map may not match what’s on the ground after a wet winter.
The San Gabriel Mountains Trailbuilders (SGMTB) handle much of the volunteer maintenance in this area, working alongside the U.S. Forest Service. They actively encourage hikers to report rock falls, downed trees, and washed-out sections.
How to report a trail hazard:
- Note your GPS coordinates or the approximate mile marker.
- Take photos if it’s safe to do so.
- Submit the report through the SGMTB contact page or the USFS Angeles National Forest trail page.
Pro Tip: Check the SGMTB site and the USFS trail page within 48 hours of your planned hike date. After any significant rain event, conditions can change overnight.
What’s it actually like at the bridge on a weekend?
The bridge itself is a genuinely cool destination. It’s a 1936 concrete arch that was built as part of a highway project through the San Gabriel Mountains, a project that was abandoned after the 1938 floods destroyed the approach roads. The bridge was simply left there, which is what gives it that eerie, photogenic quality.
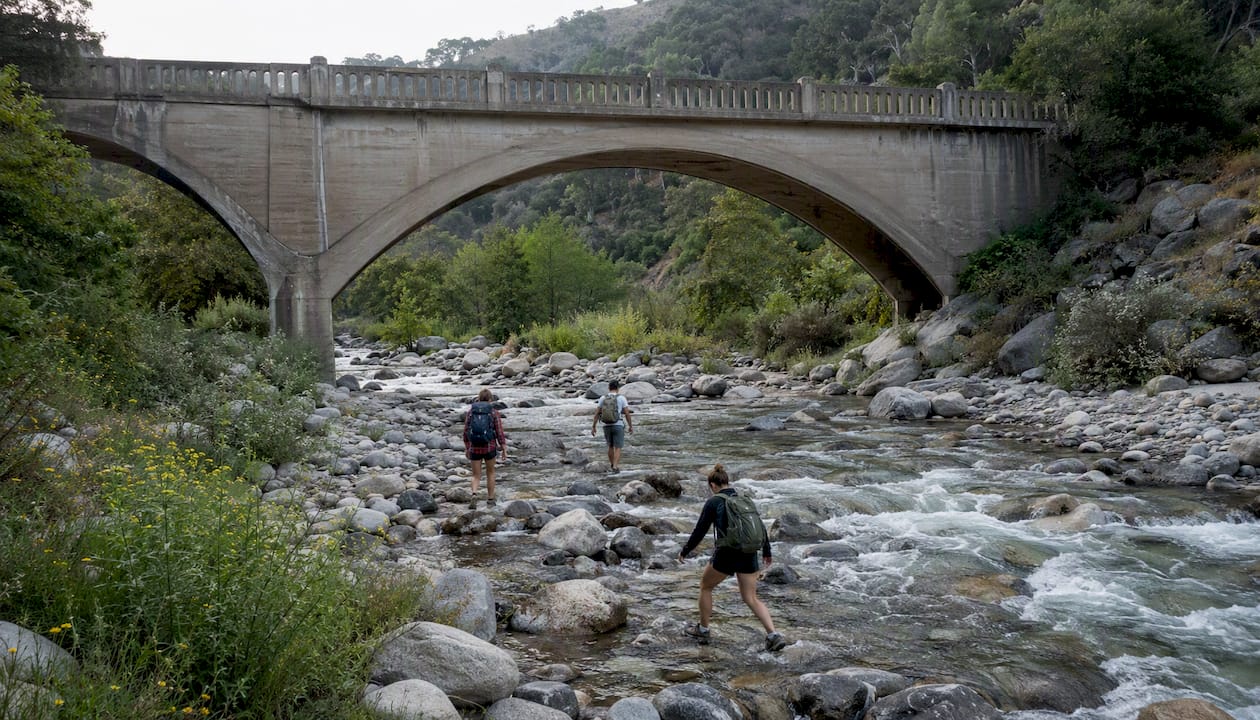
On weekends, a private commercial bungee jumping operation runs from the bridge. This increases foot traffic significantly and changes the vibe from a quiet wilderness experience to something more like a spectator event.
Etiquette tips:
- Respect posted signage. The bridge sits on private inholding land within Angeles National Forest, and public access is a courtesy, not a guaranteed right.
- Don’t crowd the staging areas when jumpers are active.
- Share the viewpoints. Groups tend to cluster at the arch, so be patient and give others space.
- Noise carries in the canyon. Keep it reasonable.
If you want the bridge to yourself, a weekday visit in late fall is your best bet. Weekends in summer can feel more like a festival than a hike.
How do you navigate when the trail shifts after a storm?
The East Fork trail doesn’t always look like the map. Washouts reroute sections, and the river crossings themselves move. A few navigation habits keep you on track.
Before you leave:
- Download the route from AllTrails or onX as an offline GPX file. Import it to your phone’s map app or a dedicated GPS device.
- Save the USFS trail page link and check it the morning of your hike for any posted closures.
On the trail:
- The general rule is simple: follow the river upstream. The bridge is at the head of the canyon.
- When you spot the old roadbed at around 3.5 miles, you’re on track. Modern Hiker’s route description confirms this as a reliable waypoint.
- When trails split near the water, take the higher option. Low routes near the bank are often washed-out remnants.
- Conserve phone battery. Put it in airplane mode between navigation checks.
Pre-hike safety checklist backed by USFS and SAR guidance
Run through this before you leave the parking lot:
- [ ] Adventure Pass or America the Beautiful Pass displayed on dashboard
- [ ] At least 3 liters of water per person
- [ ] NOAA forecast checked; no rain in the watershed
- [ ] Offline GPX map downloaded and loaded
- [ ] Satellite messenger or PLB charged and tested
- [ ] Trip plan left with someone at home (where you’re going, when you’ll be back)
- [ ] Trekking poles packed and accessible
- [ ] Hip belt unclipped before each crossing
Go/no-go decision at the crossings:
If the water is above your knee, moving faster than a walking pace, or visibly brown and turbid, do not cross. Turn back and return on a drier day. The USFS East Fork trail page posts condition advisories after major weather events — check it the morning of your hike.
Why the Bridge to Nowhere is worth doing (and when to choose it)
The Bridge to Nowhere trail earns its reputation. The 1936 arch sitting in a remote river canyon, accessible only by wading through the San Gabriel River six times, is one of those genuinely surprising places that makes you feel like you’ve found something most people don’t know about. It’s the kind of hidden hiking trail that Los Angeles keeps tucked away in plain sight.
That said, it’s not for everyone on every day. The crossings require real judgment, not just physical fitness. A moderately fit hiker who respects the water and checks conditions beforehand will have a fantastic day. Someone who shows up after a week of rain and assumes the trail is fine because it’s listed as “moderate” on an app is taking a serious risk.
The stewardship piece matters too. The bridge sits on private inholding land, and the access hikers enjoy is genuinely a courtesy. Obey posted signs, pack out everything you bring in, and report any trail damage to SGMTB. The East Fork canyon stays accessible because people treat it well.
Sources
Use these links to verify current conditions before your hike. The USFS and NOAA pages give you real-time information; the narrative guides provide historical context and route detail.
- Bridge to Nowhere via East Fork Trail, California – 11,251 Reviews, Map | AllTrails
- Bridge to Nowhere Hike Guide
- Fs
- The Bridge to Nowhere via the East Fork – Modern Hiker