Month: August 2026

  • A San Diego Weekend Itinerary for Coastal Views and Local Flavor

    A San Diego Weekend Itinerary for Coastal Views and Local Flavor

    Your San Diego weekend itinerary comes down to three neighborhood pillars: coastal (La Jolla and Torrey Pines), downtown cultural (Balboa Park, Little Italy, and the Gaslamp Quarter), and unique local experiences (Coronado, Barrio Logan, and Ocean Beach). Fly into San Diego International Airport (SAN), expect highs in the low 70s°F even in the shoulder seasons, and grab a SoCal Sights downloadable map before you land so you’re not stitching together directions on the fly.

    The 2-day version: Friday evening, land and settle into your neighborhood. Saturday morning, La Jolla Cove and Torrey Pines; afternoon, Balboa Park; evening, dinner and drinks in Little Italy or the Gaslamp. Sunday morning, Coronado and the ferry; afternoon, Barrio Logan for tacos and Chicano Park murals; evening flight out.

    The 3-day version adds a full day: Friday arrival, Saturday for coastal and downtown, Sunday for Coronado and Barrio Logan, and Monday morning for Ocean Beach or an extension out to Del Mar before your flight.

    Top three pillars to prioritize:

    • Coastal — La Jolla’s coves and Torrey Pines’ cliffside trails
    • Downtown cultural — Balboa Park, Little Italy, Gaslamp Quarter
    • Local flavor — Coronado, Barrio Logan, Ocean Beach, North Park

    Key Takeaways

    A San Diego weekend itinerary works best when built around three neighborhood pillars, coastal, downtown cultural, and local flavor, paced with San Diego’s consistently mild weather in mind.

    Point Details
    Follow the three pillars Group your weekend around coastal (La Jolla, Torrey Pines), downtown cultural (Balboa Park, Little Italy, Gaslamp), and local flavor (Coronado, Barrio Logan).
    Choose your base wisely Little Italy and the Gaslamp Quarter offer walkability; La Jolla and Coronado cost more but deliver quieter, view-driven stays.
    Budget two to four hours per stop Most major attractions, from La Jolla Cove to Chicano Park, need two to four hours, not a full day.
    Mix transit modes Use rideshares from SAN, the trolley downtown, and bike rentals in Coronado or along the La Jolla coastal path.
    Pack layers and check events first Highs stay in the low 70s°F, but evenings cool off, and local festivals can shift your weekend plans.
    Use a curated map to save time SoCal Sights offers a downloadable weekend map with pre-mapped neighborhoods and parking notes for faster planning.

    Table of Contents

    Where Should You Stay for a Weekend in San Diego?

    Pick your neighborhood before you pick your hotel, because it decides how much time you spend in the car instead of on the beach. Little Italy and the Gaslamp Quarter put you within walking distance of restaurants, coffee shops, and nightlife, and they split the difference between downtown culture and quick freeway access to La Jolla or Coronado. Expect mid-range to higher rates here, especially on weekends, since you’re paying for walkability.

    La Jolla itself runs pricier and quieter, better suited to travelers who want ocean views from their window and don’t mind driving twenty minutes into downtown for dinner. If you’re building your trip around the coastal pillar, a night or two here is worth the splurge.

    Coronado offers a different vibe entirely: resort-style stays near the beach, a short ferry ride from downtown, and a small-town feel that works well for couples or families who want distance from Gaslamp’s bar noise. Budget travelers often do better basing themselves in North Park or nearby Hillcrest, where rates run lower and you’re still a quick rideshare from Balboa Park.

    Pro Tip: Booking a hotel near a trolley stop (Little Italy and Gaslamp both have several) cuts your parking costs dramatically, since San Diego’s downtown garages add up fast over a weekend.

    How Much Time and Money Should You Budget for Each Stop?

    Most of your major stops need two to four hours, not a full day, which is exactly why the three-pillar structure works for a compact trip. La Jolla Cove and the surrounding tide pools take a couple of hours if you’re walking the coastal path and stopping for photos; add some extra time if you want to snorkel or kayak with the seals.

    Time and cost budget for San Diego itinerary stops

    Torrey Pines State Natural Reserve runs $10 to $25 per vehicle for parking depending on the day and lot, and most visitors spend two hours on the main trails. Balboa Park is the trickiest to budget for because it’s enormous. Give yourself a minimum of three hours just for the gardens and the Prado, and closer to a full day if you want to add the San Diego Zoo or multiple museums, most of which charge separate admission typically in the moderate price range per person.

    Little Italy and the Gaslamp Quarter are grazing zones more than checklist items. Plan around an hour and a half for a meal, or spend a longer evening enjoying multiple bars and restaurants. Coronado’s ferry ride takes about fifteen minutes each way and costs a few dollars, while Barrio Logan’s Chicano Park and the surrounding taco stands take roughly two hours if you’re walking the murals slowly. Lonely Planet’s weekend guide suggests building in buffer time between pillars, since San Diego traffic moves in unpredictable pockets even on short drives.

    What’s the Best Way to Get Around San Diego Neighborhoods?

    Rideshare areas at SAN are well-marked and fast, which makes a rental car optional unless you’re planning to hit Torrey Pines or Del Mar, where public transit thins out. Inside downtown, the San Diego Trolley connects Little Italy, the Gaslamp Quarter, and Barrio Logan directly, and a day pass beats paying for parking at every stop.

    La Jolla and Coronado are where a car (or at least a longer rideshare) earns its keep, since both sit far enough from downtown that walking isn’t realistic. Once you’re in La Jolla itself, though, the village and Cove area are entirely walkable, and bike rentals are common along the coastal path if you want to cover more ground between the Cove and Torrey Pines without driving.

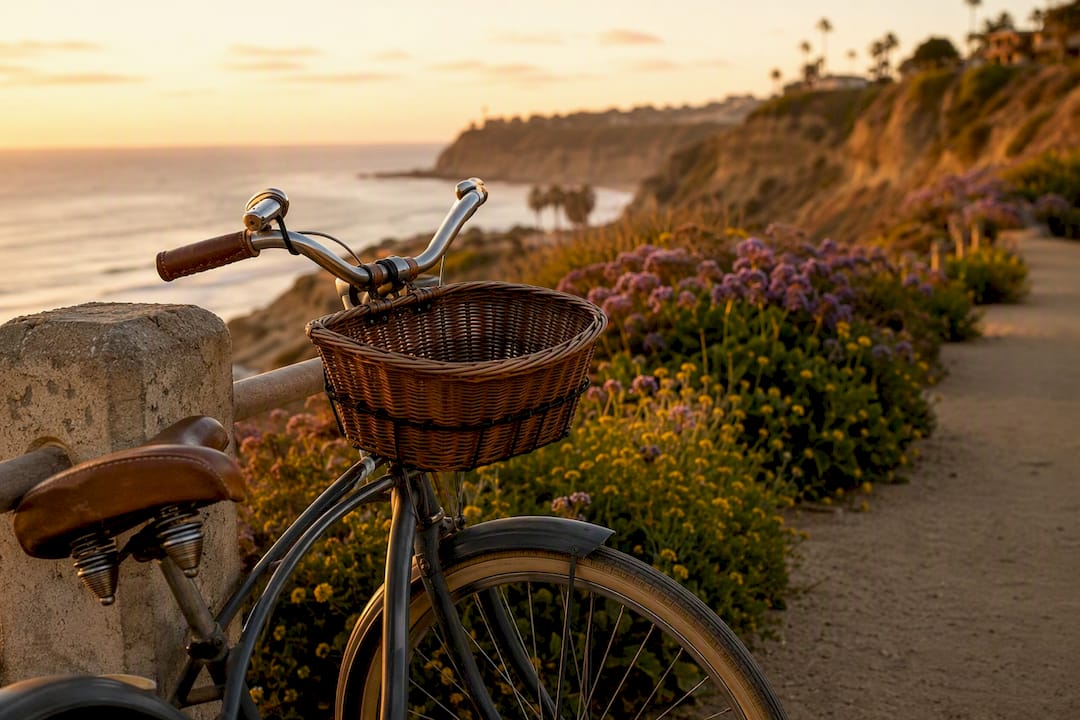
    Cruiser bike parked along San Diego coastal bike path

    Coronado is famously bike-friendly and flat, and renting a cruiser for a couple of hours to loop the island is one of the better uses of a slow afternoon. Ocean Beach and North Park both reward walking once you’re there, but getting between them and downtown works best by rideshare or trolley rather than on foot. If you want a tool to visualize how these neighborhoods connect before you land, a day-planning resource like DayHop can help you map out realistic transit windows between stops.

    Travelers with mobility challenges will find Balboa Park’s main promenade paved and accessible, and the Coronado ferry has step-free boarding, though some Torrey Pines trails involve uneven terrain and steeper grades worth checking ahead.

    Where Should You Go for San Diego Nightlife?

    The Gaslamp Quarter is the obvious answer if you want dense bar-hopping, live music, and late-night energy packed into a walkable grid, and it’s where most first-time visitors default. Little Italy runs quieter and more food-focused after dark, with wine bars and rooftop patios that suit a slower evening better than a loud one.

    North Park has become the neighborhood locals actually recommend for craft beer, with a cluster of breweries and taprooms that feel less touristy than downtown. Ocean Beach leans dive-bar and laid-back, a good fit if you want live music without a dress code or a line. Barrio Logan’s nightlife centers more on late-night taco stands and the occasional gallery opening than bars, which fits its identity as a cultural district rather than an entertainment strip.

    Coronado, by contrast, goes quiet early. If you’re staying there, plan on a relaxed dinner and a walk on the beach rather than a night out, and save the Gaslamp for a night when you’re already staying downtown.

    Is San Diego Safe for Tourists?

    San Diego is generally a safe city for visitors, but the answer shifts a bit by neighborhood, which matters when you’re moving between pillars after dark. Downtown areas like the Gaslamp Quarter and Little Italy are well-lit and busy late into the evening, though it’s worth staying alert around the edges of the Gaslamp closer to closing time, when crowds thin and foot traffic gets less predictable.

    Balboa Park is safe during the day but quiets down after sunset; plan museum and garden visits for daylight hours rather than a late evening stroll. Barrio Logan and North Park are both walkable and welcoming during the day and early evening; use the same common sense you’d apply in any city neighborhood once it gets late. Coronado and La Jolla run on the safer end overall, partly because they’re quieter, residential, and don’t have the late-night bar density that draws bigger crowds.

    Basic precautions cover most of it: keep valuables out of sight in your car (smash-and-grabs happen at scenic overlooks like those near Torrey Pines), stick to marked trails, and check local event listings before you go, since festival weekends can mean bigger crowds and tighter parking.

    Why This Neighborhood-Pillar Approach Actually Works

    I built this itinerary around three pillars instead of a checklist because clustering by neighborhood cuts down on wasted driving between far-flung attractions. SAN sits close enough to downtown that rideshare pickup is quick, which frees up your first hours for La Jolla or Balboa Park instead of traffic. The mild low-70s weather and the tacos in Barrio Logan aren’t afterthoughts. They’re why this pacing works at all.

    Plan Your Weekend Faster With a Ready-Made Map

    Piecing together a San Diego weekend itinerary from scratch means juggling parking notes, drive times, and a dozen open browser tabs. SoCal Sights skips that step with a downloadable weekend map that pre-plots the coastal, downtown cultural, and local-flavor pillars, complete with suggested parking and arrival points for each stop.

    Socalsights

    The map comes out of a community-curated list of over 100 local sights, so you’re not relying on one writer’s opinion but on locals who actually go to these spots. If you want the full rundown of what’s included, start with the SoCal Sights adventure overview and download the map before your trip so your first morning in La Jolla starts with a plan instead of a Google search.

    Where to Check Weather, Events, and Park Details Before You Go

    Sources

  • Best Tide Pools San Diego: When and Where to Go

    Best Tide Pools San Diego: When and Where to Go

    The best tide pools in San Diego are at Cabrillo National Monument, La Jolla’s Shell Beach and Dike Rock, Coronado, Sunset Cliffs, Cardiff, and Swami’s. Go in late fall through winter when minus tides land during daylight, and aim for a predicted tide of 0.7 feet or lower at Cabrillo. Arrive an hour before low tide, and start heading back once the water turns.

    • Cabrillo National Monument: the most protected, most species-rich option
    • La Jolla (Shell Beach, Dike Rock): gentle, family-friendly rock shelves
    • Coronado Beach: easy access near the Hotel del Coronado
    • Sunset Cliffs: dramatic scenery, rougher footing
    • Cardiff & Swami’s: quieter Encinitas alternatives

    Pro Tip: Check the tide chart the morning of your visit, not the week before. Tide predictions shift daily, and a 0.9 vs. 0.4 reading is the difference between a great day and a soggy one.

    “Cabrillo’s tidepools sit inside one of the best-protected rocky intertidal zones in the region, and the payoff shows during the biggest winter draw-downs.” That protection is why the low zone still hosts octopus, sea stars, and spiny lobsters that have mostly vanished from less-guarded shorelines.

    Key Takeaways

    The best San Diego tide pooling happens at Cabrillo, La Jolla, and Coronado during winter minus tides, timed to arrive an hour before low tide and to respect posted reserve rules.

    Point Details
    Best season Target November through March, when minus tides expose the low zone during daylight.
    Best tide reading Look for 0.7 feet or lower at Cabrillo, or negative readings for La Jolla’s reserve pools.
    Arrival timing Show up about an hour before low tide and leave once the tide starts rising again.
    Footwear and rules Wear closed-toe shoes with grip, and never touch or collect anything inside La Jolla’s ecological reserve.
    Rainy-day alternative Birch Aquarium at Scripps offers year-round marine exhibits when the tide chart doesn’t cooperate.
    Plan it with Socalsights Socalsights’ curated itineraries pair the best tide pool spots with parking and timing notes for families.

    Table of Contents

    What Lives in San Diego’s Tide Pools by Zone

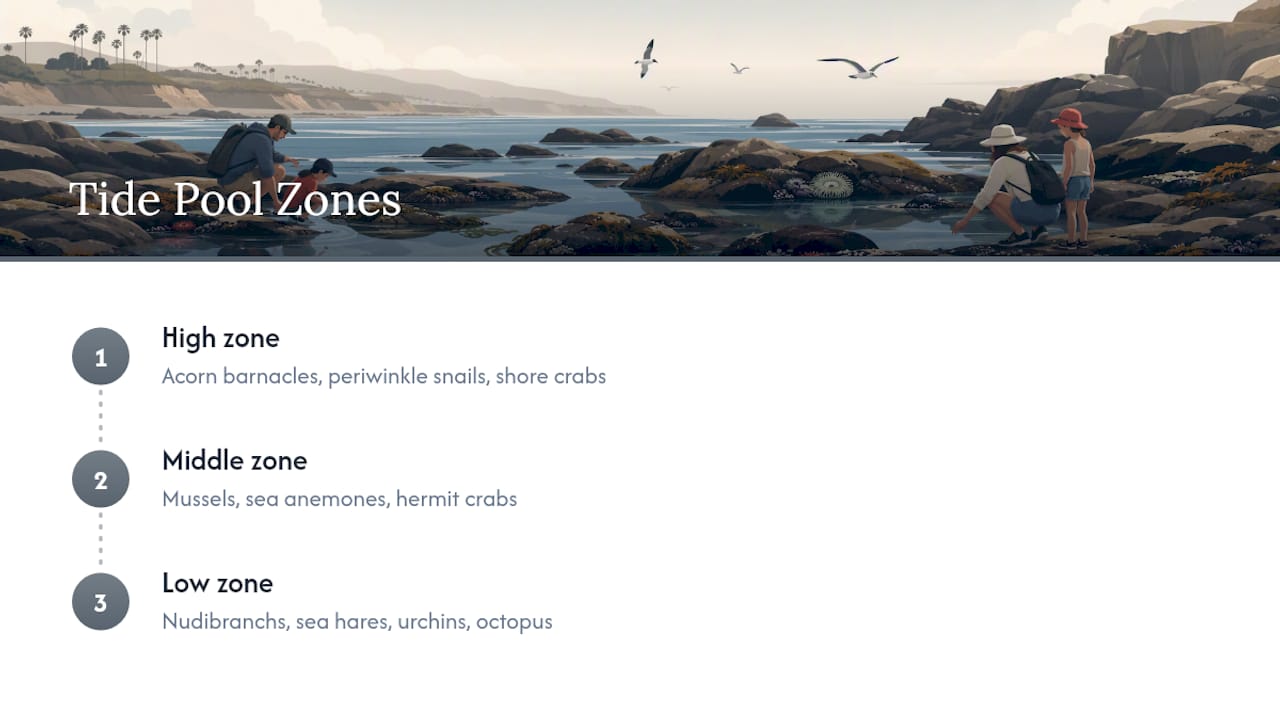
    Tide pools aren’t one habitat. They’re three stacked habitats, and knowing which one you’re standing in tells you what to look for.

    Diagram comparing marine species by tide pool zone

    The high zone gets splashed by waves but rarely fully submerged. It’s the toughest neighborhood in the intertidal world, so you’ll mostly find hardy survivors: acorn barnacles, periwinkle snails, and the occasional shore crab wedged into a crack. Nothing here is delicate. Everything has adapted to bake in the sun for hours between tides.

    The middle zone is where things get interesting for most visitors. Mussels form dense clusters here, sea anemones tuck into shaded crevices, and you’ll spot hermit crabs scuttling between rocks. This is also the easiest zone to explore safely, since it’s exposed for a longer window as the tide drops.

    The low zone is the reward for good timing. It’s only exposed during the deepest minus tides, and that’s exactly why it’s so rich. According to the National Park Service, Cabrillo’s low zone can turn up nudibranchs, sea hares, urchins, and even the occasional octopus tucked into a rock crevice. Biodiversity climbs as you move down the shore, simply because fewer creatures can survive the constant exposure higher up.

    Move slowly, check under ledges (not by flipping rocks), and remember that a still pool often has more going on than it looks.

    Do You Need a Permit to Explore San Diego Tide Pools?

    No permit is required to walk into San Diego’s public tide pools, but several sites carry rules that function like one. Much of the La Jolla coastline sits inside an ecological reserve, and touching, collecting, or removing anything, living or dead, including shells, is prohibited and enforced by state officers.

    Cabrillo National Monument charges a standard park entrance fee and posts hours that determine when the tidepool area is even open. Since the park closes in the afternoon, a low tide that hits after closing time simply isn’t accessible that day, no matter how good the number looks on the chart.

    La Jolla’s Children’s Pool beach adds a seasonal layer: it’s restricted from December 15 through May 15 to protect nursing harbor seals, which happens to overlap almost entirely with San Diego’s best minus-tide season. Plan your La Jolla stop for Shell Beach or Dike Rock instead during those months.

    The rule that covers every site, reserve or not, is simple: look, don’t touch. Tide pool animals are often more fragile than they look, and a five-second grab can undo years of a mussel bed’s growth.

    Are There Guided Tide Pool Tours in San Diego?

    Yes, and they’re worth booking if you want species identification without doing your own research first. Birch Aquarium at Scripps runs educational tidepool programs tied to the low-tide calendar, pairing a beach walk with staff who can explain what you’re looking at in real time. It’s also the aquarium’s built-in indoor alternative when the tide isn’t cooperating.

    Cabrillo National Monument hosts ranger-led tidepool walks on select low-tide days, and these are genuinely useful for families with young kids who ask a lot of “what is that” questions. Rangers know where the octopus tends to hide and which tide pools have hosted the same anemone colony for years.

    Local nature centers around La Jolla and Cardiff occasionally run small-group walks timed to the monthly minus tides, though availability shifts with the season. If a guided option isn’t running the day you’re free, the same knowledge is available through NPS interpretive signage posted at most major sites, which covers zone breakdowns and common species without needing a scheduled tour.

    How Does Weather Affect Tide Pooling Conditions?

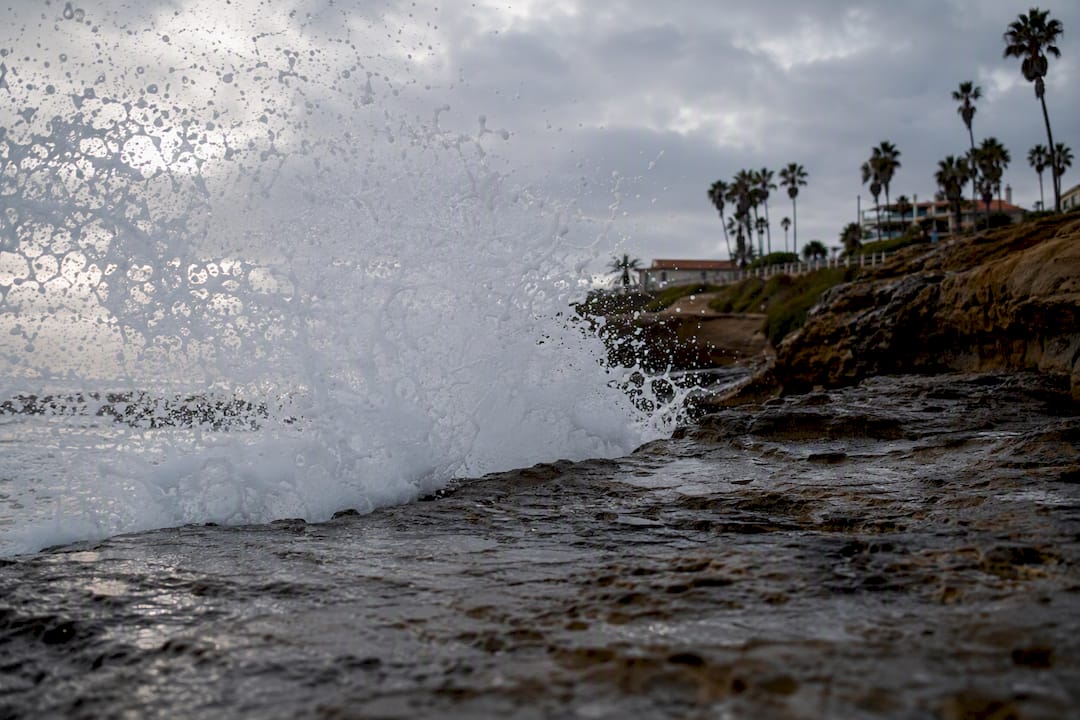
    Weather changes what’s safe to explore, even when the tide chart looks perfect. A big winter swell can push wave action over rocks that would otherwise sit dry during a low tide, creating what’s known as a sneaker wave, a wave that runs farther up the shore than the rest and can knock someone off balance without warning.

    Sneaker wave crashing on rocky San Diego shore

    Overcast, cooler days are actually the better conditions for tide pooling, not the sunny ones. Cooler air keeps pools from warming up and stressing the animals living in them, and it’s more comfortable for you to be crouched over rocks for an hour. Rain isn’t a dealbreaker, but storm runoff can cloud pools near river mouths and make it harder to see what’s inside them.

    Wind matters more than most visitors expect. A strong onshore wind stacks extra water against the coast, which can shrink your exploration window even when the tide prediction was favorable. If the surf report shows a significant swell, treat the tide chart as a starting point, not a guarantee, and give the water extra distance.

    What Tide Pooling Feels Like on a San Diego Winter Morning

    Winter mornings at Cabrillo mean smaller crowds and better light for spotting things in the low zone, though parking still fills fast once a minus tide hits on a weekend. Families do best at Dike Rock or Ocean Beach, where the rock shelves are flatter and parking is more forgiving than La Jolla’s narrow streets.

    Pro Tip: Arrive a full hour before your target low tide, and wear closed-toe shoes with real grip. Barnacles are sharper than they look, and wet rock gets slick fast.

    Let SoCal Sights Plan Your Tide Pool Day For You

    Figuring out which beach fits your family, when the tide actually cooperates, and where to park without circling for 20 minutes takes real research, the kind most people don’t have time for before a Saturday outing. Socalsights builds that legwork into ready-to-use itineraries, so you get the beach, the timing window, and the parking notes in one place instead of piecing it together from five browser tabs.

    Socalsights

    Our SoCal Sights adventure guides cover tide pool outings alongside other regional day trips, with the kind of local detail that only comes from people who’ve actually driven the parking lot and stood on the rocks. If you want a broader list of things to do around the region while you’re at it, our 100+ SoCal Sights roundup is a solid place to browse. For frequent explorers, a SoCal Sights membership unlocks curated local picks all year, not just for tide pool season. Start by checking out the adventure overview and picking your next low-tide morning.

    Where to Verify Tide Times and Park Rules

    Check the Cabrillo tidepool guide for hours and fees, NPS zone details for species, and La Jolla’s reserve rules before heading out.

    • Cabrillo National Monument (NPS): tide timing, entrance fees, closing hours
    • La Jolla Tidepools and Children’s Pool (NPS): reserve boundaries, seal-season closures
    • LaJollaMom’s tide pool guide: location-by-location local tips
    • Birch Aquarium at Scripps: a year-round backup when tides don’t line up

    Daily tide predictions shift, so a chart check the morning of your visit beats any seasonal rule of thumb.

    Frequently Asked Questions

    What is the best time of year for tide pooling in San Diego?

    Late fall through winter, roughly November through March, gives you the lowest daytime tides. That’s when minus tides expose the low intertidal zone, home to the most species, during hours you can actually see it.

    Which San Diego tide pools are best for kids?

    Dike Rock near Scripps Pier and Cabrillo National Monument’s accessible tide pool area both offer flatter rock shelves than Sunset Cliffs, making them easier and safer for young kids to explore with adult supervision.

    Do I need to pay to visit Cabrillo’s tide pools?

    Yes, Cabrillo National Monument charges a standard entrance fee, and the park posts specific hours, so a low tide that falls after closing time won’t be accessible that day.

    Can I take shells or animals home from La Jolla’s tide pools?

    No. Much of the La Jolla coastline sits inside a protected ecological reserve where removing any living or dead organism, including shells, is prohibited and enforced by state officers.

    What should I wear for tide pooling?

    Closed-toe shoes with a rubberized, grippy sole are strongly recommended. Barnacles and mussel shells are sharp, and wet rock gets slick even on a calm day.

    What if the tide chart doesn’t cooperate with my schedule?

    Birch Aquarium at Scripps offers marine exhibits year-round, giving you a reliable alternative when the timing or weather rules out a real tide pool visit.

    Sources

  • 8 Best Sunrise Hikes in San Diego for Dawn Views

    8 Best Sunrise Hikes in San Diego for Dawn Views

    The best sunrise hikes in San Diego right now are Cowles Mountain, Garnet Peak, Stonewall Peak, Mount Woodson, Torrey Pines Beach Trail, Iron Mountain, Kwaay Paay Peak, and Sycuan Peak. Here’s your fast pick list:

    • Cowles Mountain – shortest, easiest summit sunrise in the county
    • Garnet Peak – desert sunrise over Anza-Borrego, no marine layer
    • Stonewall Peak – mountain sunrise inside Cuyamaca Rancho State Park
    • Mount Woodson – the iconic Potato Chip Rock photo, longer haul
    • Torrey Pines Beach Trail – classic Pacific Ocean sunrise on sand
    • Iron Mountain – wide-angle North County views, moderate grade
    • Kwaay Paay Peak – Mission Trails’ steep, quiet alternative
    • Sycuan Peak – quick climb that pops above the clouds

    Sycuan Peak and Garnet Peak both rise above the marine layer more reliably than any coastal option, which matters more than people realize when planning a dawn hike here.

    Key Takeaways

    Sunrise hikes in San Diego succeed or fail based on elevation choice, start time, and checking official parking rules the night before.

    Point Details
    Pick elevation over coast for clouds Garnet Peak and Sycuan Peak rise above the marine layer more reliably than beach trails.
    Match trail to fitness level Cowles Mountain and Kwaay Paay Peak suit quick mornings; Mount Woodson needs four-plus hours.
    Confirm fees the night before Lake Poway and Cleveland National Forest Adventure Pass areas both charge parking fees.
    Pack for the dark Headlamp, layers, and extra water matter more on pre-dawn starts than midday hikes.
    Use Socalsights for the full plan Socalsights curates local itineraries and trailhead details so you can plan your sunrise morning tonight.

    Table of Contents

    Sunrise Hikes San Diego Trail Cheat Sheet

    Grab your headlamp and pick one. Every trail below includes what you need to know tonight so you’re not fumbling with directions in the dark tomorrow.

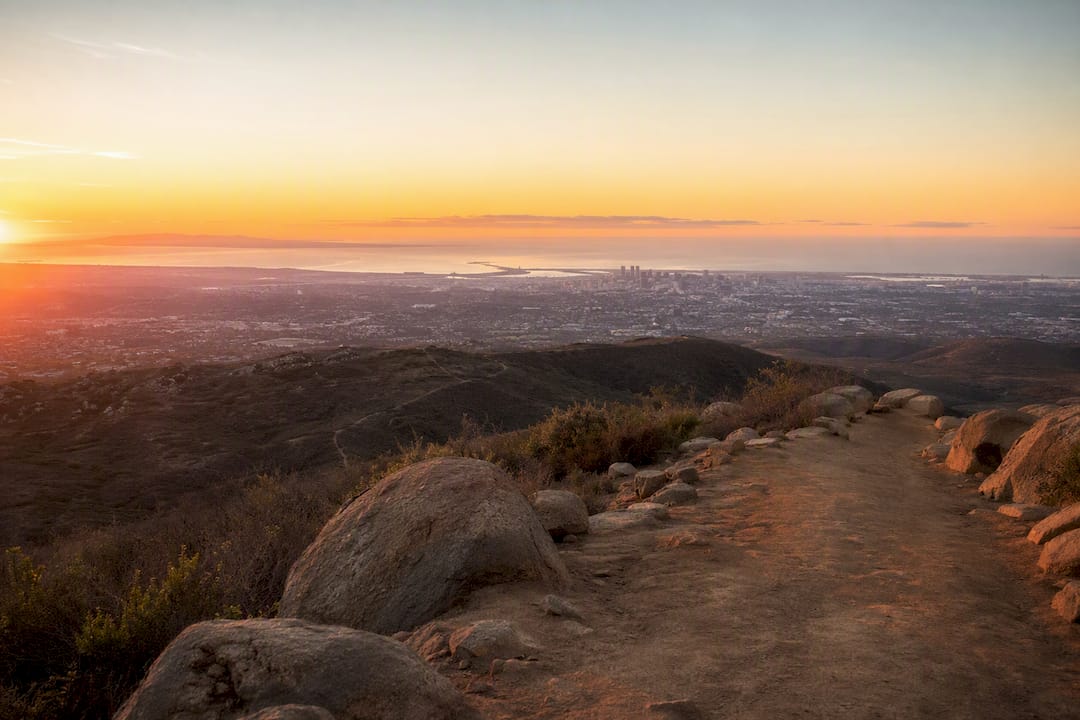
    Cowles Mountain is the trail most locals do first. It’s about 3 miles round-trip with roughly 849 feet of elevation gain, and most hikers finish in 90 minutes to two hours. Compared to the longer slog up Mount Woodson, Cowles Mountain wins as the more manageable, family-friendly sunrise pick, with free parking at the Golfcrest Drive lot. The summit views stretch from downtown to the ocean on a clear morning. Dogs are allowed on leash.

    Cowles Mountain summit city and ocean view

    Garnet Peak near Mount Laguna delivers the best desert sunrise in the region. The route runs 2.3 to 4 miles round-trip depending on which access point you use, with the summit overlooking Anza-Borrego and, on clear days, the Salton Sea. Expect about 90 minutes for the shorter version. Some Cleveland National Forest trailheads here require an Adventure Pass for parking, so check current fees before you leave home. Leashed dogs are fine on this one too.

    Stonewall Peak, inside Cuyamaca Rancho State Park, is a quieter mountain option at roughly 4.2 miles round-trip with about 800 feet of gain. Plan for two hours. The peak’s rocky summit clears the tree line for a full 360-degree dawn view, and the state park charges a day-use parking fee. Dogs aren’t permitted on this trail.

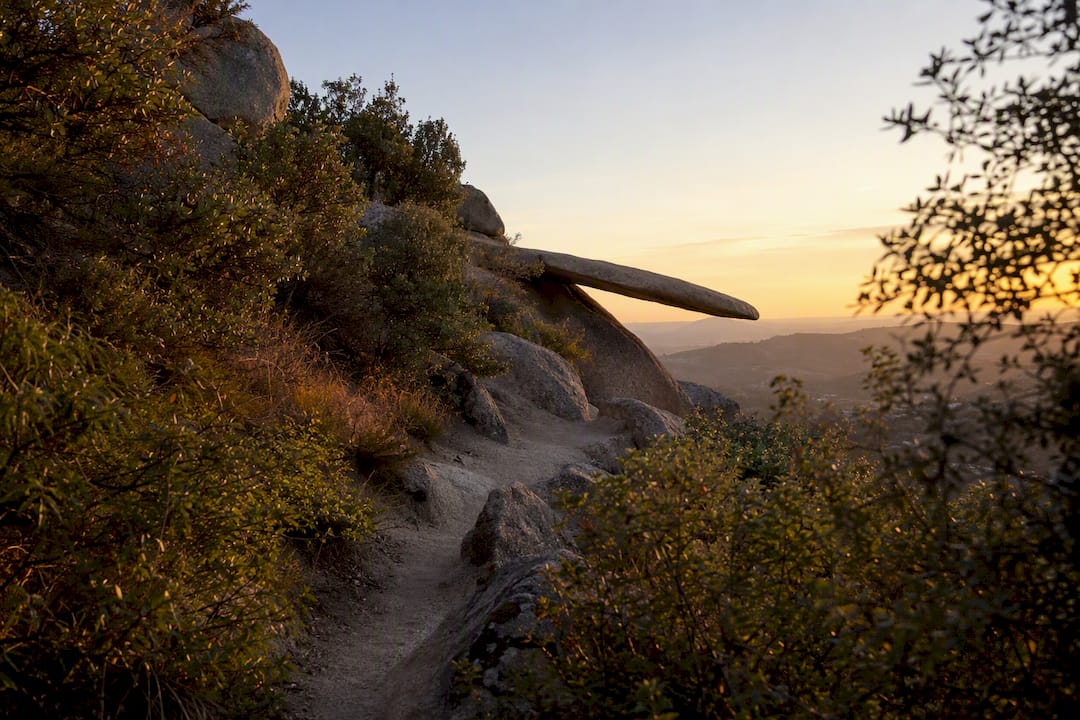
    Mount Woodson, home of Potato Chip Rock, is the one everyone’s seen on Instagram. It runs about 7.2 miles round-trip with 2,125 feet of elevation gain, and most hikers need four to five hours. Lake Poway charges a parking fee on weekends, and the crowds show up early even before sunrise. Leashed dogs are welcome.

    Potato Chip Rock formation at sunrise

    Torrey Pines Beach Trail is your pick for a true ocean sunrise. It’s a flat, easy walk along the sand and bluffs, best when the marine layer is thin enough to let color through. Parking at the state reserve fills fast, so arrive well before official sunrise. Dogs are not allowed inside Torrey Pines State Natural Reserve.

    Iron Mountain near Poway is a solid middle-ground choice at about 5.7 miles round-trip with 1,125 feet of elevation gain, typically taking two and a half to three and a half hours. The trail has exposed stretches with sweeping North County views. Parking is free and dogs are permitted on leash.

    Kwaay Paay Peak inside Mission Trails Regional Park is the steep, lesser-known cousin of Cowles Mountain, about 2 miles round-trip but with a punchy climb that keeps crowds thinner. Free parking, dogs allowed on leash.

    Sycuan Peak near Dehesa is the sleeper pick for cloud-inversion sunrises. It’s a short, steep climb to a 2,801-foot summit that often rises above the marine layer, giving you an island-in-the-clouds effect over the lowlands. Plan for about an hour up. Parking is limited at the trailhead, and dogs are allowed.

    How to Choose the Right Sunrise Hike

    Start with what you actually want to see. An ocean sunrise and a cloud-inversion sunrise are two completely different experiences, and San Diego’s geography makes both possible on the same morning depending on where you park your car.

    • Want guaranteed color and no marine layer? Go inland and up: Garnet Peak or Sycuan Peak.
    • Want the classic Pacific Ocean shot? Torrey Pines Beach Trail, but only when the marine layer is thin.
    • Short on time or fitness? Cowles Mountain or Kwaay Paay Peak get you up and down fast.
    • Chasing the iconic photo? Mount Woodson, but budget the full morning.
    • Avoiding crowds? Stonewall Peak or Sycuan Peak see far fewer hikers at dawn.

    Pro Tip: When the marine layer forecast looks thick, skip the coast entirely and head for elevation. Peaks above roughly 2,500 feet routinely poke through the cloud deck while Torrey Pines sits socked in gray until mid-morning.

    Gear, Timing, and Safety for a Dawn Start

    Getting to a summit before sunrise means hiking in the dark for at least part of the trip, so your gear list looks a little different than a midday hike.

    Bring a headlamp with a red-light mode to protect your night vision, plus warm layers you can shed as the temperature climbs. Coastal trails run damp and cool before dawn even in summer. Pack more water than you think you’ll need, download an offline map, and use trekking poles on anything with loose rock, like Stonewall Peak or Mount Woodson.

    Before you leave, check the exact sunrise time for that date, confirm the park’s opening hours, and note any parking fees. Lake Poway and Cleveland National Forest trailheads are the two most common places hikers get caught off guard by fees or gate closures.

    • Hike with a partner when you can, especially before official opening hours.
    • Tell someone your route and expected return time.
    • Carry a backup phone battery; cold mornings drain them fast.

    Pro Tip: Trail runners tend to slip on Mount Woodson’s granite slabs when they’re dew-covered. Grippy hiking shoes beat road-running shoes on every trail in this list.

    Some Cleveland National Forest trailheads require an Adventure Pass, and weekend Lake Poway parking carries its own fee. Check the official park pages before you drive out, not after you’re standing at a locked gate in the dark.

    How These Sunrise Hikes Were Selected

    Selection came down to five factors: reliable sunrise viewing, a vantage point above the marine layer or right on the coast, safety for pre-dawn starts, realistic parking and permit access, and how consistently local hikers report back on conditions.

    Official trail data from the Cleveland National Forest and state park sources backed every distance and elevation figure listed above.

    A Quick Note From Joshua

    I wake up too early for Sycuan Peak more often than I’d like to admit, and it never gets old watching the valley disappear under clouds while the summit stays lit gold.

    Let SoCal Sights Plan Your Next Sunrise Morning

    Picking a trail is the easy part. Knowing which trailhead gate opens on time, where to park for free, and which nearby spot serves coffee before a 5 a.m. drive out, that’s where a local guide beats a generic trail app every time. Socalsights builds exactly that kind of local knowledge into every guide, pulling together the small details that only someone who’s actually done the drive would know.

    Socalsights

    Our SoCal Sights Adventure Overview rounds up curated itineraries across the county, including early-morning routes and the food stops worth the detour afterward. If you want the full regional picture beyond hiking, the 100+ SoCal Sights guide is a solid next stop, and joining SoCal Sights membership gets you access to updated local recommendations as trail conditions and seasons change. Check the adventure overview tonight and have your morning planned before your alarm goes off.

    Frequently Asked Questions

    What time should I leave for a sunrise hike in San Diego?
    Leave enough time to reach the summit or viewpoint 15 to 20 minutes before official sunrise. For Cowles Mountain that means starting about an hour before sunrise; for Mount Woodson, plan on leaving your car at least 90 minutes early.

    Which San Diego trail best avoids the marine layer?
    Garnet Peak and Sycuan Peak sit high enough to clear the marine layer on most mornings, while Torrey Pines Beach Trail sits right in it when the layer is thick.

    Do I need a permit or pass for any of these trails?
    Some Cleveland National Forest trailheads near Garnet Peak require an Adventure Pass, and Lake Poway charges weekend parking fees near the Mount Woodson trailhead. Cowles Mountain, Kwaay Paay Peak, and Iron Mountain have free parking.

    Are these sunrise hikes dog-friendly?
    Most are, on leash, including Cowles Mountain, Garnet Peak, Mount Woodson, Iron Mountain, Kwaay Paay Peak, and Sycuan Peak. Torrey Pines State Natural Reserve and Stonewall Peak in Cuyamaca Rancho State Park do not allow dogs.

    How do I check the exact sunrise time for planning?
    Search the specific date and location the night before hiking; sunrise times shift by several minutes each week, and starting even ten minutes late can mean missing the best light at the summit.

    Sources

    Check park pages for permits and fees, and check trail-condition apps for closures or storm damage, before you head out for any dawn hike.

  • Joshua Tree Itinerary: Best 1 to 3 Day Plans

    Joshua Tree Itinerary: Best 1 to 3 Day Plans

    Plan on 1 full day if you want the highlights drive, or 2 to 3 days if you want the best hikes, sunset spots, and a real shot at stargazing without racing the clock. Either way, you’ll want a shortlist ready before you hit the gate: Hidden Valley, Keys View, Skull Rock, Arch Rock, Barker Dam, Cholla Cactus Garden, and Ryan Mountain cover the park’s greatest hits in one trip.

    Here’s the fast version of everything else you need to know:

    • Entrance fee: $30 per vehicle, good for 7 consecutive days, so a weekend trip and a day trip cost the same.
    • Arrival timing: get to your first stop before 7:00 a.m., especially October through May, when popular lots fill by mid-morning.
    • No services inside the park: fill your tank and grab food and water before you enter.

    I run through the full day-by-day breakdown below, but that’s the skeleton. Build from there.

    Key Takeaways

    A well-planned Joshua Tree itinerary hinges on arriving before 7:00 a.m., choosing a direction and sticking to it, and matching trip length to your priorities: 1 day for highlights, 2 to 3 days for hikes and stargazing.

    Point Details
    Match days to goals Plan 1 day for highlights, 2 days for hikes and sunset, 3+ days for oases and photography.
    Arrive before 7:00 a.m. Popular lots like Hidden Valley and Keys View often fill by mid-morning in peak season.
    Budget the entrance fee The $30 per-vehicle fee covers 7 consecutive days, so multi-day trips cost the same as a day trip.
    Arrive self-sufficient No gas, food, water, or lodging exist inside the park, and cell service is unreliable.
    Use local guidance to pivot SoCal Sights recommends flexible routing and lesser-known stops like Split Rock to dodge crowds.

    Table of Contents

    Your 1-Day Joshua Tree Itinerary: Hitting the Highlights

    A single day at Joshua Tree works better than people expect, as long as you commit to a direction and don’t backtrack. The park runs a significant distance from the West Entrance near Joshua Tree Village to the North Entrance near Twentynine Palms, and a west-to-east flow lets you hit the best-known stops in a natural line without doubling back on Park Boulevard.

    Start early. The park never closes, it’s open 24 hours a day, every day of the year, and getting to the West Entrance by 7:00 a.m. means you’ll park at Hidden Valley without circling the lot. It also buys you cooler hiking temperatures, which matters more than most first-timers realize once the sun climbs past 10:00 a.m.

    Here’s a route that keeps you moving without feeling rushed:

    1. 7:00 a.m., West Entrance. Enter and head straight to Hidden Valley (about 15 minutes in). Walk the 1-mile loop trail through boulder formations that once hid cattle rustlers. Budget 45 minutes.
    2. 8:15 a.m., Barker Dam. A short drive over, then a flat 1.3-mile loop past a historic water tank and petroglyphs. Give it 45 minutes to an hour.
    3. 9:30 a.m., Cap Rock. A quick 5-minute pullover with a short interpretive loop. Fifteen minutes is plenty.
    4. 10:00 a.m., Skull Rock. Park at the small roadside lot or walk over from Jumbo Rocks Campground. The rock formation lives right off the road. Fifteen to twenty minutes.
    5. 10:30 a.m., Arch Rock (via Jumbo Rocks). A 1.4-mile round-trip walk to a natural rock arch. Plan on 45 minutes, longer if you’re taking photos.
    6. 12:00 p.m., Lunch and Cholla Cactus Garden. Eat what you packed (there’s no food inside the park) at a picnic spot, then walk the quarter-mile loop through a dense field of teddy bear cholla. Thirty to 45 minutes total.
    7. 2:00 p.m., Keys View. Drive up for panoramic views over the Coachella Valley toward the Salton Sea. Come back later for sunset if you have time to spare.

    That itinerary covers roughly 25 to 30 miles of driving with stops, which typically eats up 5 to 6 hours including short hikes. If you’re doing a true day trip and want to end on the best possible note, loop back to Keys View for sunset instead of leaving after your afternoon visit.

    Pro Tip: Keys View is the single most popular sunset spot in the park, and the lot is small. Arrive 45 to 60 minutes before sunset, especially on weekends, or you’ll be parking on the shoulder and walking in.

    If Hidden Valley’s lot is full when you arrive, don’t panic and don’t wait around. Pivot to Barker Dam first, then loop back. Flexibility with order matters more than following any itinerary exactly.

    Building a 2-Day Joshua Tree Itinerary With Hikes and Stargazing

    Two days changes what’s possible. You get the same highlights from the 1-day plan, but you’re no longer rushing past Ryan Mountain or skipping Lost Horse Mine because the light’s fading. This is the itinerary I’d recommend for most first-time visitors, and it lines up with what a lot of experienced desert travelers already believe: two to three days tends to be the sweet spot for seeing the park’s highlights without feeling like you’re sprinting between parking lots.

    Day 1 follows the 1-day route above, but slow it down. Add extra time at Hidden Valley and Barker Dam, then treat Keys View as your evening anchor rather than an afternoon add-on.

    • Morning: Hidden Valley, Barker Dam, Cap Rock (unhurried pace)
    • Midday: Skull Rock, Arch Rock, lunch
    • Afternoon: Cholla Cactus Garden, then rest or grab dinner supplies in town
    • Evening: Keys View for sunset, then stay for the stars

    Joshua Tree’s remote location and minimal light pollution make it one of the better stargazing spots in Southern California, and Keys View or Cap Rock’s open sky work well for it. Bring a red-light headlamp so you don’t wreck your night vision or anyone else’s.

    Day 2 is where the real hiking happens. Enter early again, this time targeting the park’s interior trails before the day heats up.

    1. Ryan Mountain (3 miles round trip, 2 to 3 hours). This is the best moderate hike in the park for the payoff. You’ll climb about 1,000 feet to a summit with 360 degree views across the whole basin. Start by 8:00 a.m. if you’re visiting between May and September.
    2. Lost Horse Mine. A wide, gently graded trail to a well-preserved 1890s gold mine. Less dramatic than Ryan Mountain but easier on tired legs.
    3. Cottonwood Spring (short loop, 30 to 45 minutes). A quieter stop in the park’s southern section, with a fan palm oasis that draws far fewer crowds than the northern attractions.
    4. Split Rock Loop (2 miles, 1 to 1.5 hours), optional. A lesser-known loop through boulder piles that most day-trippers skip entirely, which makes it a solid choice if you want quiet trail time after two busier stops.

    If you’re camping inside the park, book early. Campgrounds fill fast on Recreation, sometimes months out for the busy October through May stretch, and several sites take reservations rather than first-come, first-served.

    Pro Tip: Book your campsite the moment your travel dates are firm. Popular sites like Jumbo Rocks and Hidden Valley Campground routinely sell out weeks ahead during peak season.

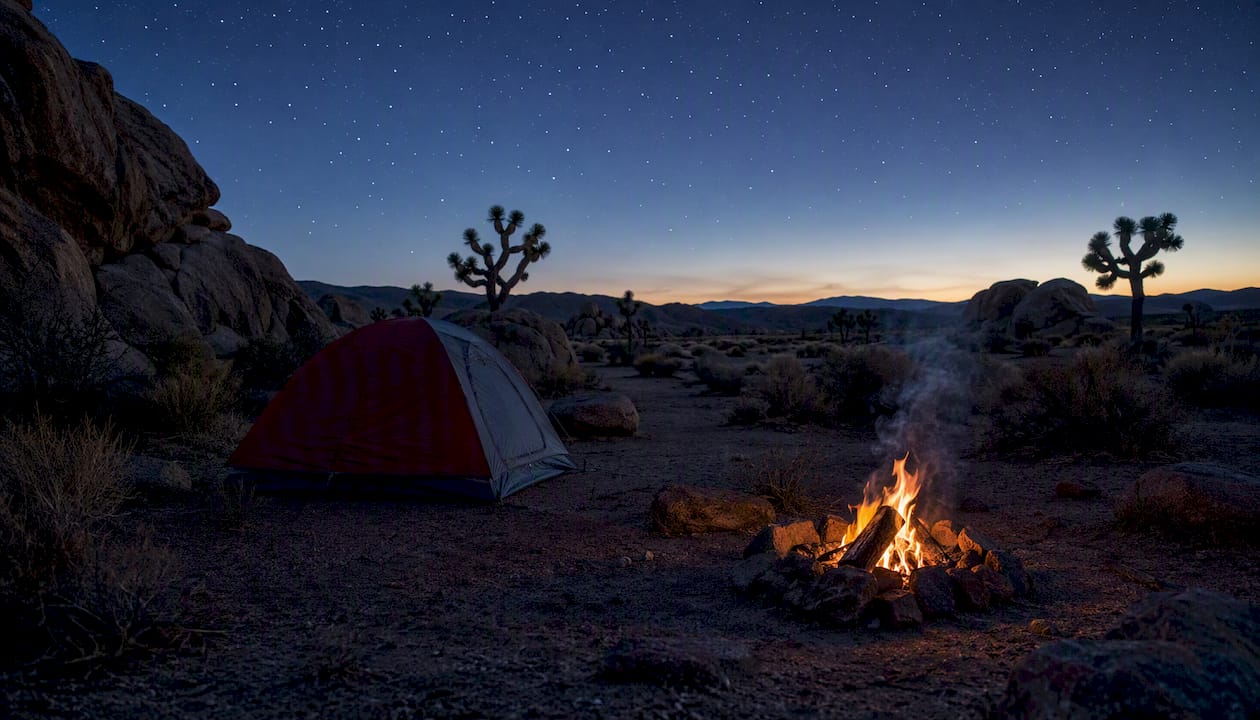
    Joshua Tree national park campsite with campfire at dusk

    If climbing or photography is your focus rather than hiking, swap Ryan Mountain for extra time at Hidden Valley and Jumbo Rocks, which are both dense with established bouldering problems and classic rock faces.

    Planning a 3+ Day Joshua Tree Itinerary or Specialty Trip

    With three or more days, you can stop treating the park like a checklist and start treating it like a place worth lingering in. This is when Lost Palms Oasis, Cottonwood Spring’s quieter trails, and full-day photography or climbing sessions actually fit without cutting something else short.

    A sample Day 3 layout: drive to the park’s southern Cottonwood section early, then hike Lost Palms Oasis Trail, a 7.2-mile round trip (4 to 5 hours) to the largest fan palm oasis in the park. It’s a longer, hotter hike than anything in the 2-day plan, so start at first light and carry more water than feels necessary.

    1. Morning: Cottonwood Visitor Center, then Lost Palms Oasis Trail
    2. Afternoon: Rest, or a shorter add-on like the Mastodon Peak loop nearby
    3. Evening: Head toward Pioneertown or Palm Springs for dinner if you’re staying outside the park

    Photography-focused schedules revolve around light, not mileage. Golden hour at Cholla Cactus Garden (right after sunrise) turns the spines nearly luminous. Arch Rock and the Jumbo Rocks formations photograph best in late afternoon, when shadows carve out the boulder texture. Keys View at both sunrise and sunset gives two completely different color palettes over the same valley.

    Climbing and bouldering draw visitors from well beyond Southern California, since the park’s granite formations support established routes across nearly every skill level. Hidden Valley and Real Hidden Valley remain the most concentrated bouldering zones. Check current conditions before you go, since closures for nesting raptors or extreme heat do happen.

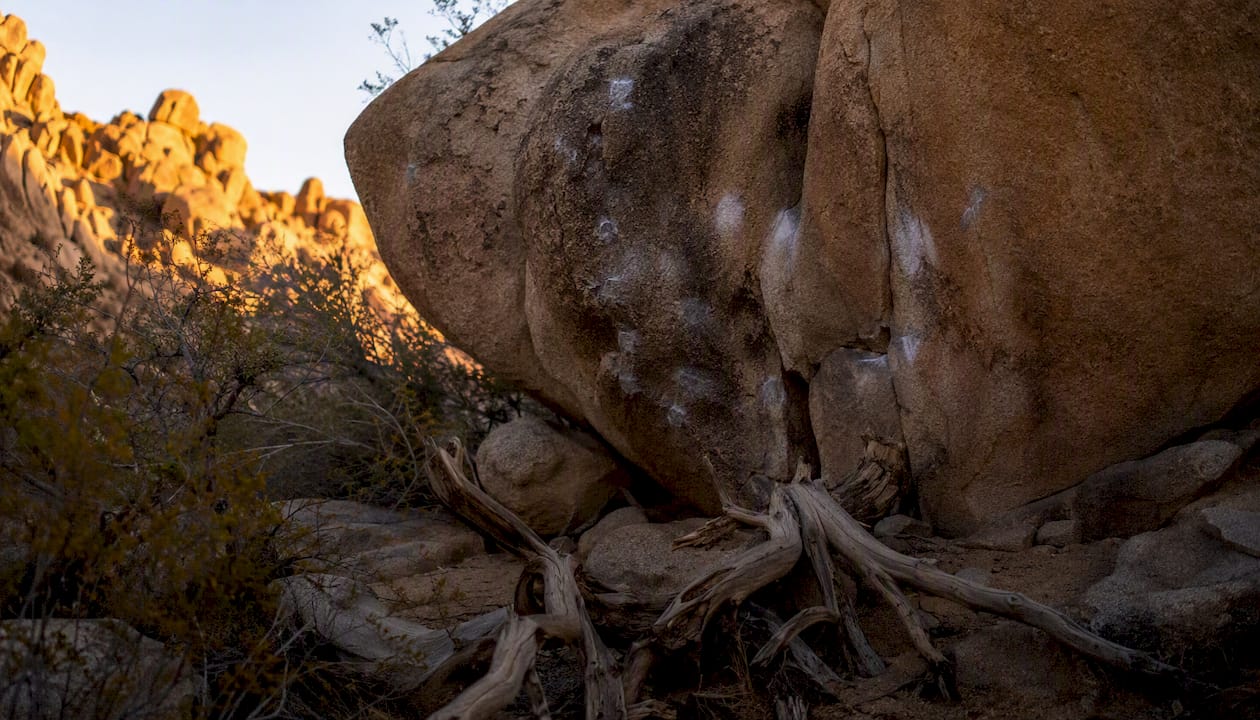
    Close view of granite boulders for climbing in Joshua Tree

    Pro Tip: If Keys Ranch guided tours are running, book through recreation.gov well ahead. Slots are limited, and it’s one of the only ways to see the historic ranch homestead up close.

    If you’ve got a rest day or want a change of scenery, Pioneertown’s Old West storefronts and Palm Springs’ restaurant scene are both under an hour away and make a good pressure valve between hiking days.

    Entrance Fees, Hours, and Parking You Need to Know

    The park runs on a simple fee structure: $30 per vehicle, valid for 7 consecutive days, so there’s no reason to rush a multi-day visit to save money. Annual and interagency passes are also sold through recreation.gov if you’re planning repeat trips.

    Joshua Tree is open 24 hours a day, 365 days a year, but that doesn’t mean parking is unlimited. Peak season runs October through May, and popular lots like Hidden Valley and Keys View regularly fill by mid-morning on weekends.

    • West Entrance (near Joshua Tree Village): best for the 1-day and 2-day itineraries above; closest to Hidden Valley and Keys View.
    • North Entrance (near Twentynine Palms): good alternate start point if the West Entrance line looks long, especially early morning.
    • South Entrance (near Cottonwood): best pick if you’re heading straight for Cottonwood Spring or Lost Palms Oasis on day 2 or 3.

    If your first-choice lot is full, don’t circle. Move to your next planned stop and loop back later. Before you leave home, check the park’s current conditions page for closures or weather alerts, and remember the basics: no off-road driving, no removing rocks, plants, or wildlife, and pets are restricted to roads and campgrounds, not trails.

    When Should You Visit Joshua Tree for the Best Experience?

    October through April is the sweet spot for comfortable hiking temperatures, and it’s also the busiest stretch of the year. Spring weekends and holidays bring the heaviest crowds; weekday visits in November or February often feel noticeably quieter.

    • Best time of day: early morning (before 9:00 a.m.) or late afternoon avoids both peak heat and peak parking pressure.
    • Summer (June to September): brutally hot by midday, often past 100°F. Hike at dawn or skip strenuous trails entirely.
    • Winter nights: can drop near freezing even when days feel mild, so pack layers regardless of the daytime forecast.
    • Weather watch: sudden wind and dust events happen, particularly in spring, so check conditions the morning of your visit.

    For crowd mitigation, arrive at your first stop by 7:00 a.m. and treat weekends in peak season as a reason to start even earlier than usual.

    Where to Stay: Camping Inside the Park vs. Nearby Towns

    Camping inside the park puts you steps from sunset views and dark skies, but most sites require reservations through recreation.gov, and popular campgrounds like Jumbo Rocks book out weeks or months ahead in peak season.

    • In-park camping: best for 2-day-plus trips focused on stargazing and early trailhead access; book early, since there are no services inside the park to fall back on.
    • Joshua Tree Village and Yucca Valley: closest towns to the West Entrance, with grocery stores, gas, and casual restaurants.
    • Twentynine Palms: best base if you’re entering from the North Entrance or exploring the park’s eastern side.
    • Palm Springs: roughly an hour from the West Entrance, worth it if you want a resort stay bookending a rougher day of hiking.

    Choose in-park camping for night-sky access and early starts. Choose a nearby town if you want real meals, a shower, and a bed after a long hiking day.

    What to Pack for a Safe Desert Trip

    Joshua Tree is unforgiving if you show up unprepared, and rangers are blunt about it: hike during cooler morning or late-afternoon hours, and treat summer heat as a genuine hazard, not an inconvenience.

    Pro Tip: Screenshot your itinerary and a park map before you lose signal. You won’t get a second chance to look something up once you’re past the entrance station.

    Stay on marked roads and trails, never feed wildlife, and pack out all trash, including anything that blows out of an open car window.

    Local Tips From SoCal Sights to Skip the Crowds

    A few lesser-known additions can turn a good trip into a great one. Split Rock Loop and the quieter pullouts along Geology Tour Road rarely see the crowds that Hidden Valley draws, and they photograph just as well. Early morning light hitting the boulder flats near Jumbo Rocks Campground, before the tour buses show up, is one of the best photo windows in the entire park.

    Stock up in Yucca Valley or Joshua Tree Village before you enter. Once you’re inside, you’re on your own for food and water.

    • Skip the crowded Hidden Valley lot at midday and try Split Rock instead
    • Buy water and snacks in Yucca Valley, not at the last gas station before the gate
    • Use flexible routing: if one lot is packed, pivot to a quieter stop and circle back later
    • Check our SoCal Sights Adventure Overview for more curated Southern California day-trip ideas

    Pro Tip: If you only remember one thing from local visitors, remember this: the park rewards flexibility. A rigid itinerary that ignores a full parking lot wastes more time than the pivot ever would.

    What Actually Matters When Planning a Joshua Tree Itinerary

    Most itineraries online treat Joshua Tree like a checklist to clear as fast as possible, cramming ten stops into a single day and calling it efficient. That’s backwards. The park’s best moments, Ryan Mountain’s summit view, the quiet at Cottonwood Spring, a clear night sky at Cap Rock, all require slowing down, not speeding up.

    The conventional advice to “see everything in one day” undersells how much a rushed pace costs you. You’ll spend more time circling full parking lots than you save by skipping a second day. If I had to prioritize one thing, it’s this: pick a direction, commit to it, and build in slack for pivots when a lot is full. Rigid itineraries break the moment reality doesn’t cooperate, and in a park this popular, reality rarely cooperates on a tight schedule.

    Two days beats one for almost every traveler. The extra day doesn’t just add stops, it changes the entire pace of the trip from a sprint to something you’ll actually remember.

    Plan Your Next Southern California Trip With SoCal Sights

    Socalsights is the alternative to generic trip-planning sites for exploring Southern California beyond the obvious stops: instead of a one-size-fits-all list, you get curated, locally-sourced recommendations built around how people actually spend a day or a weekend out here.

    Socalsights

    If this itinerary got you thinking about what else the region has to offer, our 100+ SoCal Sights collection rounds up community-favorite spots you won’t find on a standard tourist map, and our daycation guide is built for exactly the kind of tight, well-timed planning this Joshua Tree itinerary required. Whether you’re stitching together a weekend around the park or looking for what to do on your way back through Palm Springs or the Coachella Valley, start with the SoCal Sights Adventure Overview and build your next trip from there.

    Frequently Asked Questions

    How many days do I need for a Joshua Tree itinerary?
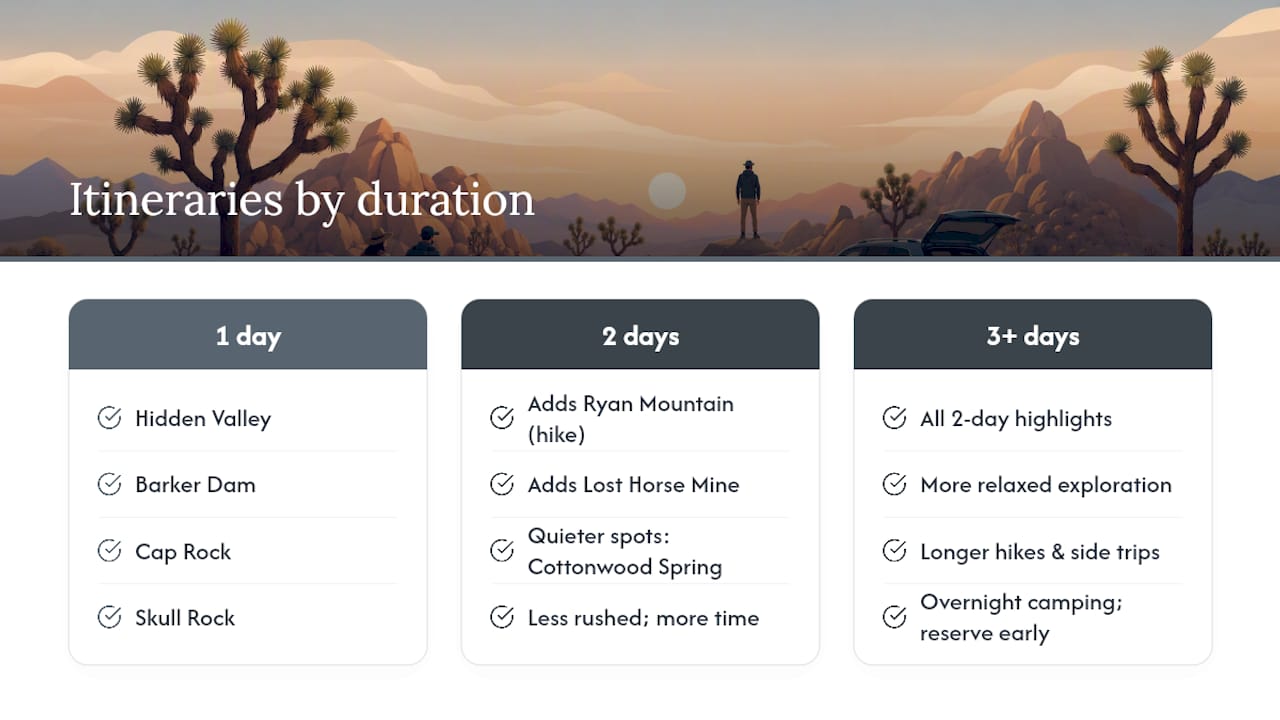
    One full day covers the main highlights like Hidden Valley, Skull Rock, and Keys View. Two to three days lets you add Ryan Mountain, Lost Horse Mine, and quieter spots like Cottonwood Spring without rushing.

    Comparison chart of Joshua Tree itinerary duration and highlights

    What’s the best 1-day itinerary for Joshua Tree?
    Enter early through the West Entrance, hit Hidden Valley, Barker Dam, Cap Rock, Skull Rock, and Arch Rock in the morning, then Cholla Cactus Garden after lunch, and finish at Keys View for sunset.

    Do I need a reservation to enter Joshua Tree National Park?
    No day-use reservation is required, but campgrounds and some guided tours book through recreation.gov and fill up well ahead during peak season.

    What is the entrance fee for Joshua Tree National Park?
    The fee is $30 per vehicle, valid for 7 consecutive days, so a multi-day itinerary costs the same as a single day trip.

    When is the best time to visit for photography or stargazing?
    Golden hour just after sunrise or before sunset gives the best light for photography, while clear nights at Keys View or Cap Rock offer some of the best stargazing conditions in the region.

    Is there food or water available inside the park?
    No. The park has no restaurants, grocery stores, or gas stations inside its boundaries, so bring everything you need before entering.

    Sources

    Confirm current conditions before finalizing any itinerary. Start with the official fees and passes page, the plan-your-visit overview, and current conditions and closures. Book campgrounds and tours through recreation.gov. Curious about the terrain itself? The USGS ecology page explains why the Mojave and Colorado deserts collide here.

  • 9 Best Hot Springs Southern California Offers Right Now

    9 Best Hot Springs Southern California Offers Right Now

    If you’re chasing the best hot springs Southern California has to offer, here’s the short list: Deep Creek Hot Springs for adventurous hikers who don’t mind a sweaty approach, Remington Hot Springs for a mellow riverside soak near Bakersfield, Warner Hot Springs for roadside geothermal access without the hike, Gaviota Hot Springs for a coastal detour off Highway 101, Montecito Hot Springs for a short Santa Barbara trail with ocean views, Esalen Hot Springs for a bucket-list Big Sur experience (permission required), Beverly Hot Springs for an urban mineral spa inside LA city limits, and the Desert Hot Springs resort cluster (Two Bunch Palms, Miracle Springs, and others) for anyone who wants a bed, a robe, and zero dirt under their fingernails. I’ve personally made the trek to Deep Creek, and it’s exactly as rewarding and exhausting as everyone says.

    Two numbers to keep in your back pocket before you plan anything: Warner Hot Spring has been recorded at roughly 138°F, hot enough to burn skin if you’re not careful, while Whites Point Hot Springs on the Palos Verdes coast runs closer to 115°F, a temperature most people find tolerable for a longer soak. That range tells you something important: not every “hot spring” in Southern California feels the same, and picking the right one matters as much as picking the right day to go. For current trail and closure information, the US Forest Service’s San Bernardino National Forest page and California’s state parks system are your best friends, and I’ll point you to specific pages throughout this guide.

    Key Takeaways

    Choosing the right Southern California hot spring comes down to matching your hiking tolerance and water-type preference to the correct category of site, whether that is backcountry, roadside, or resort.

    Point Details
    Match effort to site type Deep Creek and Montecito demand real hiking; Warner and Beverly need none.
    Verify water treatment Ask resorts directly whether pools are naturally flowing geothermal or conventionally heated.
    Respect temperature extremes Warner runs near 138°F while Whites Point sits closer to 115°F, so know before you soak.
    Check closures before departure Confirm current trail status through USFS or state parks pages within a week of travel.
    Plan your route with SoCal Sights Socalsights curates itineraries and local updates so trip planning takes minutes, not hours.

    Table of Contents

    Natural Hot Springs Southern California Travelers Actually Visit

    Southern California’s hot springs split into three rough categories: backcountry natural pools you hike into, roadside geothermal features you practically park next to, and managed resort spas where someone else handles the plumbing. Here’s how the major players stack up.

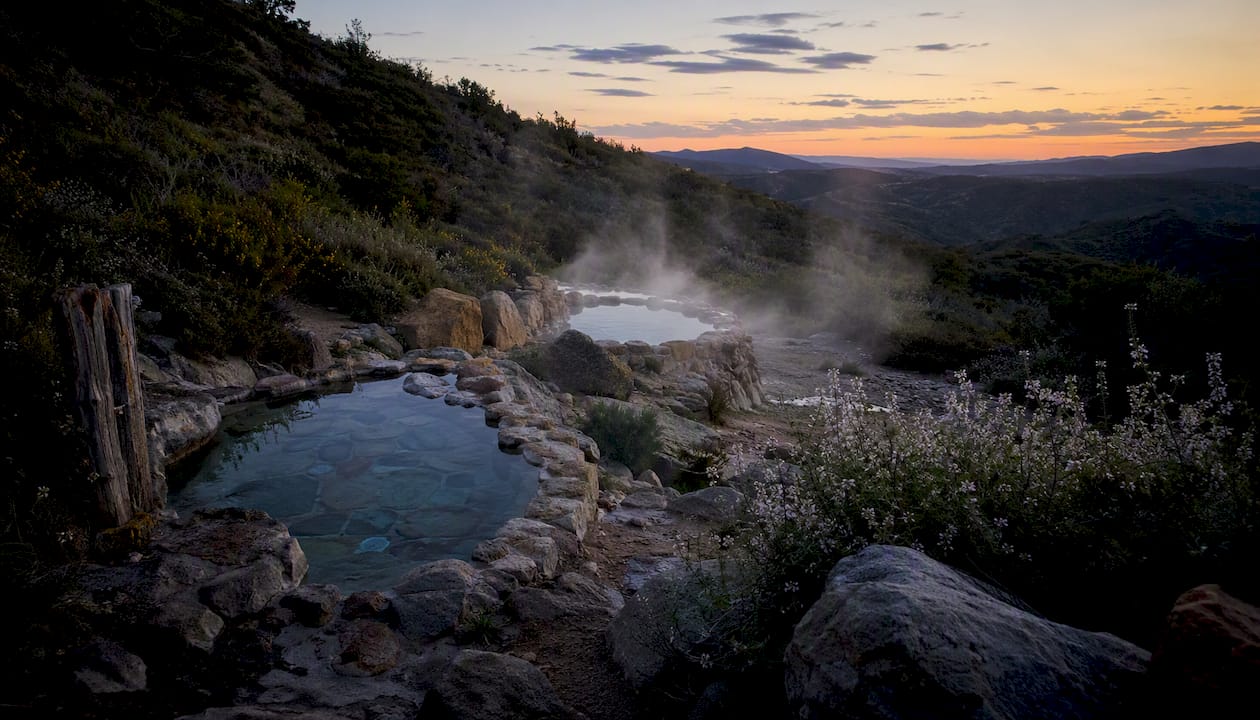
    Deep Creek Hot Springs sits in the San Bernardino National Forest, tucked into a bouldered stretch of the Mojave River near Hesperia. It’s about 1.5 to 2 hours from Los Angeles, and getting there is half the story. Most visitors access the multiple soaking pools via Bowen Ranch or Bradford Ridge, with parking fees running anywhere from $5 to $30 depending on the lot. The Bowen Ranch route is a rugged dirt road tough on low-clearance cars, and the hike itself covers several miles of exposed desert trail. Clothing is optional in parts of the pool area, so know that before you bring the kids. Photo caption placeholder: sunlight hitting the terraced pools along Deep Creek’s riverbank.

    Best for: self-sufficient hikers who treat the destination as part of the workout.

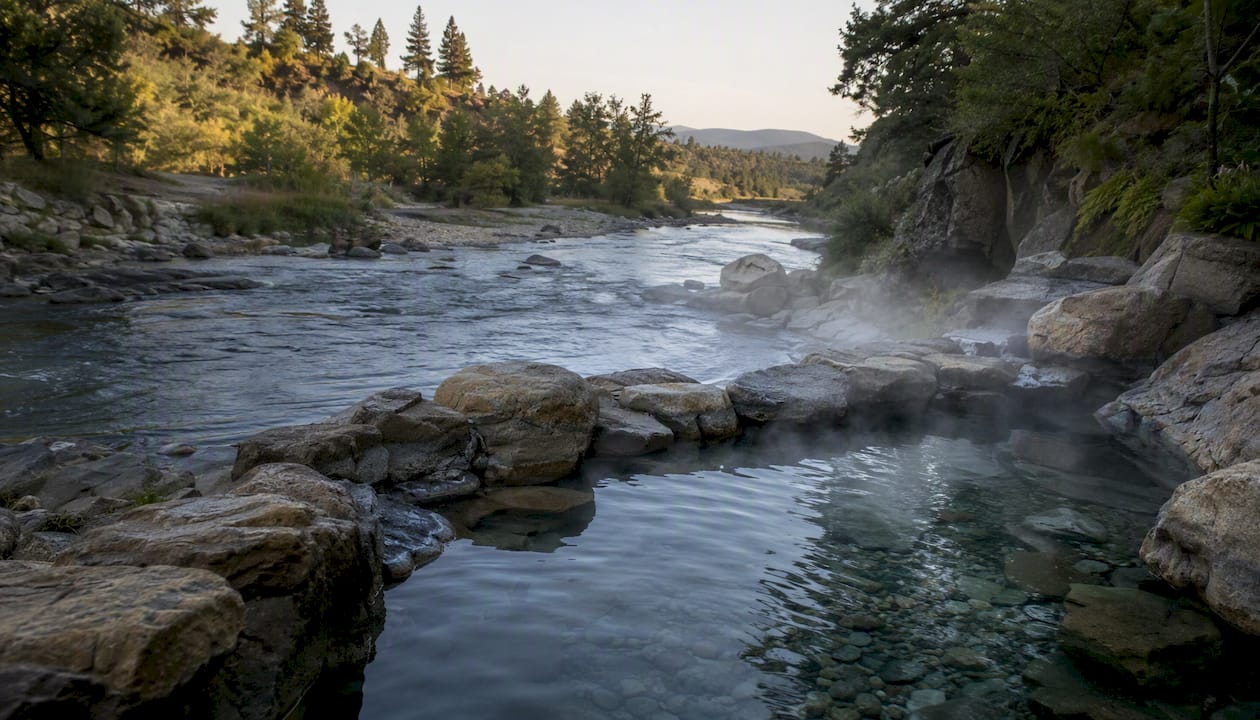
    Remington Hot Springs, also known locally as Children of the Earth, sits along the Kern River near Bakersfield, a couple hours north of the LA basin. This one’s far gentler than Deep Creek. A short walk from a pullout parking area gets you to several rock-lined pools right at the river’s edge, and the temperature swings with the season since the pools mix with cold river flow. No facilities exist here beyond a dirt lot, so pack out everything you bring in. Photo caption placeholder: steam rising off Remington’s pools against the Kern River backdrop.

    Best for: couples or small groups wanting a low-effort natural soak without a long approach.

    Rock-lined hot spring pools at river's edge

    Warner Hot Springs, up in San Diego County near the community of Warner Springs, is about as roadside as hot springs get. Access from the nearest road measures roughly 11 feet, and the water itself has been documented at up to 138°F, which is scalding by soaking standards. This isn’t a wade-in-and-relax spot. It demands respect and, frankly, a thermometer if you’re unsure. Photo caption placeholder: mineral deposits ringing Warner’s steaming source pool.

    Best for: travelers who want to see a genuine geothermal feature without any hiking, and who understand the heat risk going in.

    Gaviota Hot Springs lies just off US 101 near Santa Barbara, inside Gaviota State Park. The hike in is short, maybe 20 to 30 minutes on a modest trail, leading to small terraced pools with ocean views peeking through the hills. It’s popular enough on weekends that solitude isn’t guaranteed. Photo caption placeholder: layered stone pools with the Santa Barbara coastline in the distance.

    Terraced hot spring pools with coastal view

    Best for: day-trippers combining a coastal drive with a quick soak.

    Montecito Hot Springs, above Santa Barbara in the Los Padres National Forest, requires a steeper scramble than Gaviota but rewards hikers with a series of small pools cut into the hillside. Trail conditions shift after wildfires and storms, since this area has seen both in recent years, so checking current status matters more here than almost anywhere else on this list. Photo caption placeholder: cascading pools framed by chaparral above Montecito.

    Best for: fit hikers comfortable with rougher, sometimes overgrown terrain.

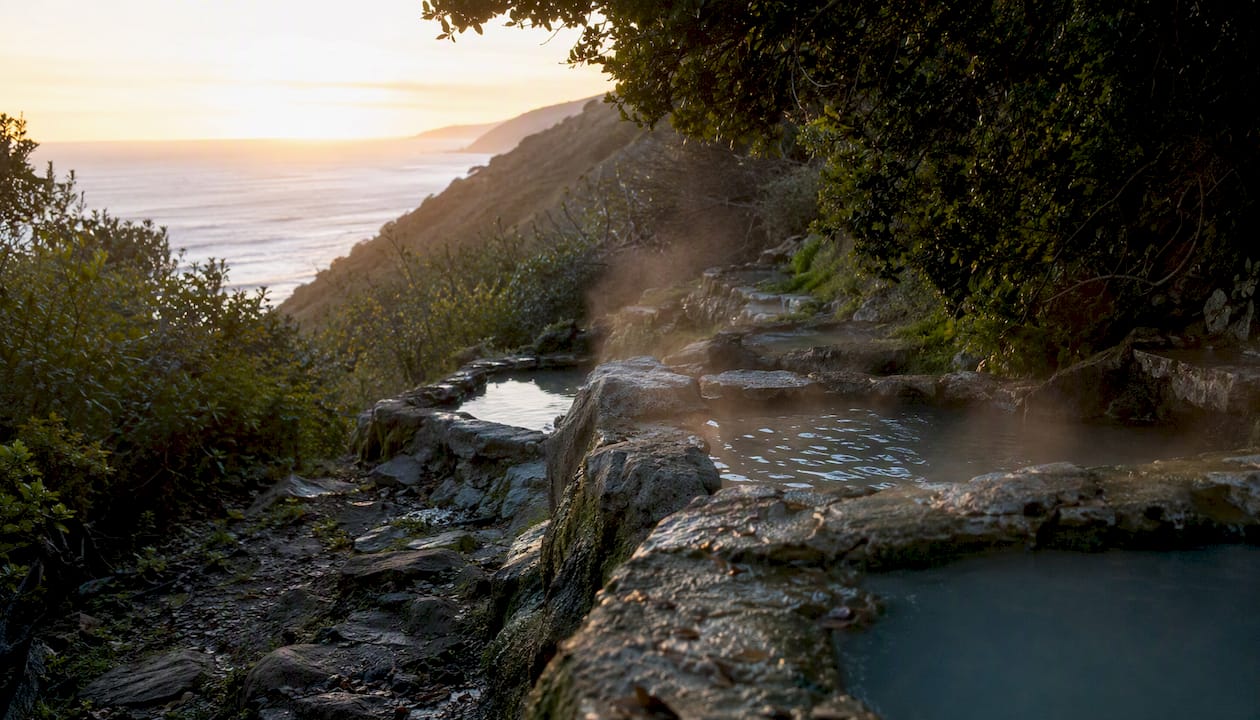
    Esalen Hot Springs, perched on cliffs above the Pacific in Big Sur, is the most legendary and least accessible entry here. Public access has historically been limited to specific overnight or workshop bookings through the Esalen Institute, and it sits well north of the traditional Southern California boundary, more Central Coast than SoCal proper. Still, it earns a spot on nearly every serious hot springs list, so I’m including it with the caveat that it takes planning months ahead. Photo caption placeholder: cliffside pools overlooking the Big Sur coastline at dusk.

    Best for: travelers planning a special-occasion trip who book access in advance.

    Beverly Hot Springs, operating today as a spa in LA’s Koreatown neighborhood, is the only natural mineral thermal spa located within the city of Los Angeles itself. The water draws from a 2,200-foot artesian well, with pools running roughly 96 to 105°F. No hiking, no dirt roads, just a parking spot and a membership or day-pass fee. Photo caption placeholder: the spa’s tiled soaking room, calm and steam-filled.

    Best for: urban dwellers who want mineral water benefits without leaving city limits.

    The Desert Hot Springs cluster, near Palm Springs, groups together resorts like Two Bunch Palms and Miracle Springs, each drawing from the same underground aquifer that made this stretch of the Coachella Valley famous. Pool counts and temperatures vary by property, but most offer several soaking options ranging from cooler lounging pools to hotter mineral tubs, plus on-site lodging, spa treatments, and restaurants. Photo caption placeholder: a resort pool deck at Desert Hot Springs glowing under string lights at night.

    Resort pool deck with string lights at night

    Best for: couples or solo travelers wanting a full overnight wellness getaway.

    For a broader sense of how these fit into the wider LA hot springs conversation, Timeout’s roundup of options near Los Angeles lines up with much of what’s above, and adds resort names like Glen Ivy for readers who want an even more polished spa day.

    How Do You Pick the Right Hot Spring for Your Trip?

    Before you commit to a destination, run through this checklist:

    1. How far are you willing to hike? Deep Creek and Montecito demand real effort; Warner and Beverly require none.
    2. Do you want untreated mineral water or a resort pool? Backcountry springs and Beverly Hot Springs flow naturally from the ground. Resort pools, even at legitimate geothermal properties, sometimes blend in conventionally heated or chlorinated water, so ask directly which pools are naturally flowing before you book.
    3. What facilities do you actually need? If a restroom within reach is non-negotiable, cross backcountry sites off your list.
    4. What’s your clothing comfort level? Some natural pools operate clothing-optional; resorts do not.
    5. Are kids or pets coming along? Long hikes, hot water, and unsupervised riverbanks don’t mix well with small children. Most resort pools are far safer for families, and pets generally aren’t welcome at any of these sites, natural or managed.

    Watch for a few red flags before you lock in plans. Seasonal closures hit backcountry trails hard, especially after wildfires or heavy rain. Water temperatures above 115°F or so demand real caution, since skin burns faster than most people expect. Some access roads cross private property or tribal land, and posted closures there aren’t suggestions. Parking scams pop up occasionally near popular trailheads, where someone charges a “fee” with no actual authority to do so. And any surface water in Southern California carries some water-borne illness risk, which we’ll cover more in the next section.

    Pro Tip: If you’re torn between a backcountry hike and a resort stay, book the resort for your first visit to a new area and save the hike for a return trip once you know the terrain and season better.

    Timing matters almost as much as the site itself. Overnight resort stays let you soak at golden hour and again after dark, when pools clear out and the whole experience feels different. Day hikers into backcountry springs, on the other hand, should aim for cooler months and early starts, since afternoon heat on exposed desert trails turns a fun outing into a survival exercise fast.

    What Do You Need to Know Before You Go?

    Check access status before you drive anywhere near a backcountry site. The US Forest Service’s San Bernardino National Forest page posts current trail and closure notices for the Deep Creek area, and California’s state parks system covers Gaviota. If your route crosses land tied to a tribal nation, sites like the Tolowa Dee-ni’ Nation’s official page model the kind of cultural context and permission information worth seeking out wherever a spring sits near tribal land, even if the specific nation differs by region.

    Pack smarter than you think you need to. Sturdy footwear matters more at Deep Creek and Montecito than anywhere else on this list, since loose rock and uneven riverbeds cause most hiking injuries. Bring more water than feels necessary, layered clothing for temperature swings between trail and pool, basic first-aid supplies for heat exhaustion or minor scrapes, a real map or downloaded offline route (cell service disappears fast in these canyons), and something to pack out your trash. Fifteen to twenty minutes per soak is a reasonable ceiling in hotter pools; longer sessions risk overheating, especially if you’re not drinking water between dips.

    Seasonal risk shifts by region and by month. Here’s a rough map of what closes when:

    Region/Site Type Primary Risk Typical Window Where to Check
    Backcountry desert springs (Deep Creek, Warner) Extreme heat, dehydration June through September USFS forest pages
    Coastal/hillside springs (Gaviota, Montecito) Wildfire and storm trail damage Varies by fire/storm season State parks and USFS alerts
    Riparian springs (Remington) Flooding, breeding-season wildlife closures Spring, following heavy rain Local land manager sites
    Resort properties (Desert Hot Springs, Beverly) Minimal, but check for maintenance closures Rare, spot-check before travel Resort websites directly

    Some travel guides flag a real health concern worth taking seriously: warm surface water in certain natural hot springs can carry Naegleria fowleri, and guidance generally recommends avoiding head submersion in untreated sources. That’s not a reason to skip backcountry soaking altogether, but it is a reason to keep your head above water and skip the deep dunk, no matter how tempting it looks in someone else’s photo. Beyond personal safety, treat these places the way you’d want a stranger to treat your own backyard: pack out every scrap of trash, stay on established trails instead of cutting new paths through fragile riverbank vegetation, and resist the urge to stack rocks into “new” pools. These springs survive on the goodwill of the people who visit them.

    Why I Trust This List (And Where the Gaps Are)

    I’ve hiked into Deep Creek myself, and the thing that surprised me most wasn’t the pools, it was how much the approach shapes the experience. You earn that soak, and it changes how you value it compared to a resort spa you drove straight up to. That contrast is the whole reason this list mixes backcountry sites with managed resorts instead of picking a lane.

    Here’s my honest take: most hot springs guides either romanticize the wilderness sites or oversell the resort experience, and both approaches shortchange readers. The backcountry crowd loves to downplay real risk, things like 138-degree water at Warner or Naegleria warnings in stagnant pools, because it dulls the adventure narrative. Meanwhile, resort marketing rarely admits that some of their “geothermal” pools are actually running through conventional heaters, which matters if you specifically want untreated mineral water. Ask the front desk directly which pools are naturally flowing before you book a stay, because the answer isn’t always obvious from the website copy.

    . The sites flagged with firsthand notes in this guide reflect actual visits, not secondhand write-ups stitched together from other blogs… If you’ve soaked at one of these spots recently and conditions have changed, whether that’s a new closure at Montecito or a fee change at Deep Creek, and I’ll factor it into future updates. Southern California’s backcountry changes fast after fire season, and a guide that doesn’t stay current isn’t worth much.

    Let SoCal Sights Handle the Trip Planning Part

    Chasing down current trail conditions, comparing eight different sites, and figuring out which resort has an open room on your travel dates eats up an entire evening most people don’t have. Socalsights built its curated guides specifically so you don’t have to do that research yourself every single time.

    Socalsights

    Rather than piecing together outdated blog posts and forum threads, you get local knowledge that’s actually organized around how people plan real trips. That means:

    • Curated regional guides that group hot springs with nearby food spots and lodging worth pairing with your soak
    • Printable daycation checklists so you’re not scrambling for gear the morning you leave
    • Local business updates when access conditions or hours shift at nearby restaurants, gear shops, or resorts
    • Membership perks for local businesses near these springs, which means the recommendations you see come from people who actually operate in these areas

    If you’re mapping out a full weekend rather than a single soak, browse the 100+ SoCal Sights collection for a broader set of stops worth building into your route, or check the daycation planning guide for a ready-made itinerary format you can adapt to whichever hot spring made your shortlist.

    Where to Check Before You Head Out

    • San Bernardino National Forest — US Forest Service: trail conditions and closure notices for the Deep Creek area, check the week before and again the night before if possible.
    • California State Parks system pages: seasonal access updates for Gaviota State Park, worth a look a few days ahead of any trip.
    • Tolowa Dee-ni’ Nation official site: a model for how tribal government pages handle access permissions and cultural sensitivity guidance where springs sit near tribal land.
    • Glen Ivy Hot Springs official site: useful for comparing managed resort pricing and amenities against the Desert Hot Springs cluster.
    • Resort or property websites directly for Two Bunch Palms, Miracle Springs, and similar Desert Hot Springs properties, since availability and day-pass policies change by season.

    Sources

  • Your Southern California Road Trip: Best Routes and Stops

    Your Southern California Road Trip: Best Routes and Stops

    Pick one focused loop and you’ll have a better trip than someone who tries to cover all of SoCal in a week. The Pacific Coast Highway (PCH / Highway 1) makes the best backbone for a coastal loop. Add Joshua Tree or Santa Barbara depending on your days, fly into LAX or SAN, and lock in a rental car that starts and ends at the same airport to skip one-way drop fees.

    Your three loop options at a glance:

    • Coastal PCH loop (3 days): LAX or SNA → Malibu → Santa Barbara → Ventura → back to LAX
    • Coast + city loop (5 days): LAX → Santa Barbara → Laguna Beach → San Diego → back to LAX via I-5
    • Extended coast, desert, and mountains loop (7–10 days): LAX → Santa Barbara → San Diego → Joshua Tree → Palm Springs → Big Bear → back to LAX

    Quick logistics before you book:

    • Regional airports include LAX, SAN, SNA (Orange County), ONT (Ontario), and BUR (Burbank) — SNA is the most convenient start for an Orange County or Laguna Beach focus
    • Book a midsize SUV or sedan; avoid cargo vans on PCH’s narrow coastal curves
    • Spring and fall are the best seasons — desert heat peaks in summer, and mountain roads can require chains in winter

    Key Takeaways

    A focused loop itinerary, timed for spring or fall, is the single most effective way to get an authentic Southern California road trip without spending half your days in traffic.

    Point Details
    Pick one loop Choose coastal PCH, coast + city, or desert + mountains based on your trip length.
    Best entry airports LAX and SAN are the most flexible; SNA suits Orange County and Laguna Beach starts.
    Spring and fall timing Mild weather across coast, desert, and mountains; avoid summer desert heat and winter mountain chains.
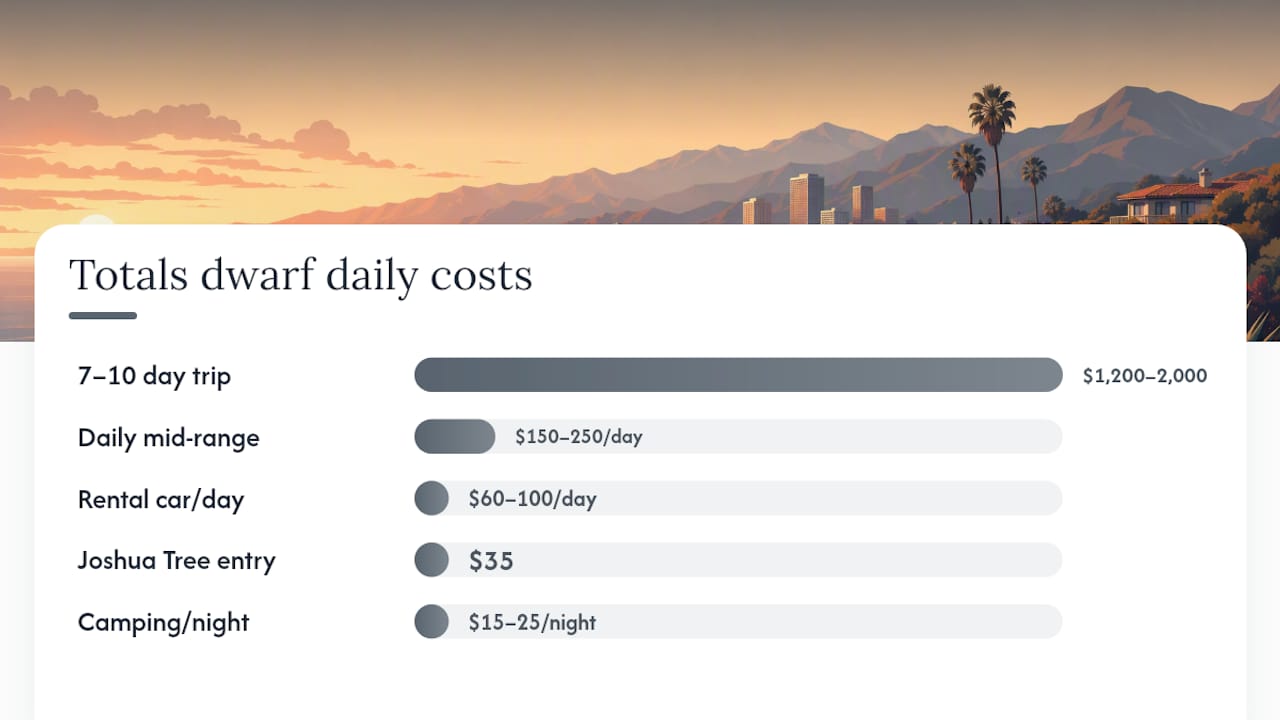
    Budget baseline Plan $150–$250 per day mid-range, plus $35 vehicle entry at Joshua Tree and $60–$100/day for a rental car.
    Socalsights planning Community-sourced itineraries, hidden-gem dining, and local parking tips at southerncalifornia.site.

    Cost comparison for Southern California road trips


    Table of Contents

    How much does a Southern California road trip cost?

    Budget roughly $150–$250 per day for a mid-range trip covering gas, food, and a modest hotel. A 3-day coastal loop runs around $500–$750 total (excluding flights). Stretch to 7–10 days and expect $1,200–$2,000 depending on accommodation choices. Car rentals average $60–$100 per day through major agencies at LAX or SAN. State park day-use fees at Joshua Tree run $35 per vehicle. Camping inside Joshua Tree costs $15–$25 per night and requires advance reservations through Recreation.gov.


    What to pack for coast, mountains, and desert

    SoCal’s terrain shifts fast. A morning in Santa Barbara is 65°F and breezy; an afternoon in Joshua Tree can hit 95°F. Pack for both.

    • Layers: a light fleece or windbreaker for coastal evenings and mountain mornings
    • Sun protection: SPF 50+, a wide-brim hat, and UV-blocking sunglasses for desert days
    • Footwear: trail shoes for Joshua Tree hikes, sandals for beach towns
    • Water: a refillable 32 oz bottle minimum; carry extra in the car for desert stretches
    • Car kit: phone mount, portable charger, paper map (cell service drops in mountain and desert areas)

    Where to stay along the route

    Coastal: Santa Barbara’s State Street corridor has boutique hotels ($180–$300/night) and a few well-reviewed motels closer to $120. Laguna Beach runs pricier; budget travelers do better staying in nearby Dana Point. For a splurge, the Montage Laguna Beach sits directly above the ocean.

    Santa Barbara boutique hotel exterior on State Street

    Desert: Palm Springs has mid-century modern hotels that are genuinely fun to stay in, ranging from $100 budget motels to $400+ design resorts. Joshua Tree’s gateway towns (Twentynine Palms, Yucca Valley) offer vacation rentals and small inns that book out weeks ahead in spring.

    Mountain: Big Bear Lake has cabin rentals and lakeside lodges, typically $150–$250/night, that work well as a one-night mountain detour before looping back toward LA.


    Where to eat on a SoCal road trip

    Food is one of the best reasons to take this trip slowly. A few stops worth planning around:

    Santa Barbara: La Super-Rica Taqueria on Milpas Street is a James Beard Award-winning taco stand that Julia Child called her favorite Mexican restaurant in the country. Cash only, line out the door, absolutely worth it.

    Freshly made Mexican tacos at Santa Barbara taco stand

    Laguna Beach: The Cliff Restaurant has the ocean view, but locals eat at Nick’s Laguna Beach for the fish tacos without the tourist markup.

    San Diego: Barrio Logan’s taco shops along National City Boulevard and the Convoy District’s Korean BBQ and Vietnamese pho spots are where locals actually eat. Old Town is fine for atmosphere, not for the food.

    Palm Springs: Cheeky’s on North Palm Canyon Drive does a rotating weekend brunch menu that draws a line by 9 AM. Arrive early or expect a 45-minute wait.

    Pro Tip: The 100+ SoCal Sights list on Socalsights includes community-sourced dining picks and local food stops that don’t show up on the usual travel blogs.


    How to beat traffic and save time on the road

    LA traffic is a real variable. The 405 and I-10 during morning and evening commutes (roughly 7:00–9:00 AM and 4:00–7:00 PM) can turn a 30-minute drive into 90 minutes. Plan your drives to leave cities before 7 AM or after 7 PM when possible.

    PCH itself slows down on summer weekends between Malibu and Santa Monica. If you’re driving that stretch, a Tuesday or Wednesday morning is a different experience entirely. For the desert leg, the drive from San Diego to Joshua Tree via I-10 is smooth and fast outside of Friday afternoon.

    Waze and Google Maps both handle SoCal traffic well in real time. Download offline maps for Joshua Tree and Big Bear before you leave cell range.


    Safety tips for driving Southern California

    A few things that don’t always make the travel blogs:

    Wildfire awareness: Southern California’s fire season now runs nearly year-round, with the highest risk from October through January when Santa Ana winds peak. Check CAL FIRE before driving mountain routes, and know that road closures can happen with little notice.

    Desert heat: Never leave pets or children in a parked car. Carry at least one gallon of water per person per day in Joshua Tree. If your car overheats, pull over and turn off the AC before the engine.

    Mountain driving: Big Bear and the Angeles National Forest roads can require tire chains from November through April. Check Caltrans road conditions at Quickmap before heading up.

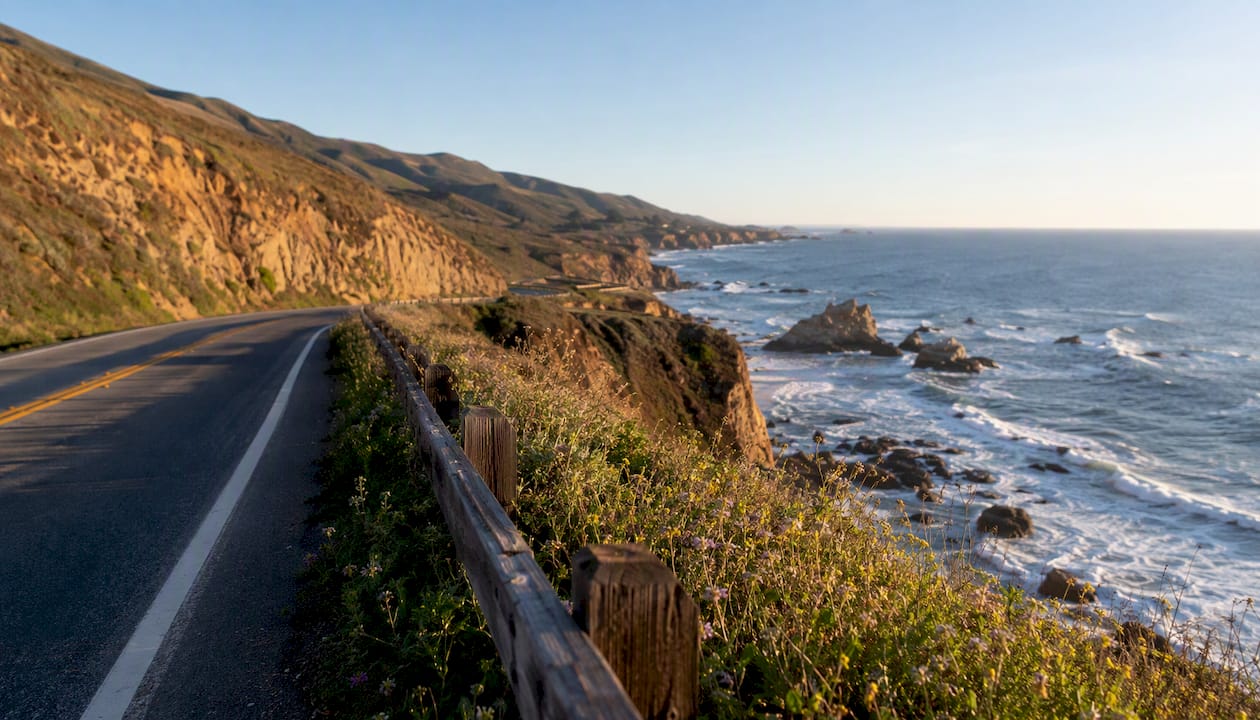
    Coastal cliffs: PCH has several stretches where the shoulder drops sharply. Pull into designated turnouts for photos, not onto the road edge.


    What locals actually know about planning this trip

    There’s a version of a SoCal road trip that looks great on paper and feels exhausting in real life: six cities in seven days, three hours of driving every day, and no time to actually sit somewhere and feel like you’re there.

    The trips that work are the ones built around a single region done well. A focused sub-region approach means you spend an afternoon at Heisler Park in Laguna Beach instead of just photographing it from the car. It means you catch sunrise at Joshua Tree’s Skull Rock instead of arriving at noon when it’s 100°F and crowded.

    Loop itineraries also solve a practical problem most people don’t think about until they’re booking: one-way rental fees. Starting and ending at the same airport keeps that cost down and makes your flight timing much easier to manage.

    One local tip that doesn’t get enough attention: swap one coastal day for a mountain or desert detour. Most visitors spend all their time on PCH and never make it to Big Bear or Idyllwild. Those mountain towns are an hour from the coast and feel like a completely different state.


    Socalsights makes the planning part easy

    Planning a SoCal road trip means sorting through hundreds of “best of” lists that all recommend the same five spots. Socalsights cuts through that with community-sourced guides built by people who actually live here.

    Socalsights

    The SoCal Sights Adventure Overview gives you curated route maps, hidden-gem dining picks, and day-by-day itinerary templates that include the parking tips and scenic pullouts the generic guides skip. The 100+ SoCal Sights list is a practical starting point for mixing iconic stops with local favorites your fellow travelers won’t have on their itineraries.

    For businesses and locals who want to contribute their own favorite spots, the membership page is where to start. Browse the full guide and start building your itinerary at southerncalifornia.site.


    Sources

    These are the sources worth bookmarking before you finalize your route.

  • Little Saigon Food: What to Eat and Where to Go

    Little Saigon Food: What to Eat and Where to Go

    Little Saigon food is authentic Vietnamese cuisine served across tightly knit U.S. Vietnamese enclaves, and the dishes you absolutely need to try first are pho, bánh mì, cơm tấm, bún thịt nướng, bánh xèo, chả giò, chè, and Vietnamese iced coffee. These aren’t fusion approximations or Americanized takes. They’re the real thing, made by families who carried recipes across the Pacific after 1975 and have been perfecting them in strip-mall kitchens ever since.

    Here’s your quick-start list before we get into the details:

    • Pho — slow-simmered beef or chicken broth with rice noodles; the neighborhood’s most iconic bowl
    • Bánh mì — a French-Vietnamese baguette stuffed with pork, pickled daikon, cilantro, and jalapeño
    • Cơm tấm — broken rice topped with grilled pork, a fried egg, and fish sauce
    • Bún thịt nướng — cold vermicelli noodles with charred grilled pork and fresh herbs
    • Bánh xèo — a sizzling, turmeric-yellow crepe filled with shrimp, pork, and bean sprouts
    • Chả giò — crispy fried spring rolls, best eaten wrapped in lettuce with mint
    • Chè — sweet dessert soups or layered drinks made with beans, jellies, and coconut milk
    • Vietnamese iced coffee — strong drip coffee over sweetened condensed milk and ice

    Read on for which U.S. neighborhoods to visit, how to order each dish like a local, and a plug-and-play SoCal itinerary for both half-day and full-day visits.


    Key Takeaways

    Little Saigon food is best experienced through community-sourced curation, early-morning timing, and a willingness to follow the local crowd into nondescript strip-mall storefronts.

    Point Details
    Start with the classics Pho, bánh mì, and cơm tấm are the three dishes every first-timer should try before branching out.
    Orange County leads Westminster/Garden Grove is the largest Vietnamese community outside Vietnam and the most concentrated food destination.
    Follow the line, not the stars The best vendors often have minimal online presence; a crowd of regulars is the most reliable quality signal.
    Bring cash Many bakeries, chè shops, and market stalls are cash-only or add a card surcharge.
    Socalsights curates the best Socalsights builds SoCal food itineraries around local loyalty and walkability, not star ratings.

    Table of Contents

    What “Little Saigon” actually means and why it matters for food lovers

    The name “Little Saigon” refers to Vietnamese-American enclaves that formed largely after the fall of Saigon in April 1975, when hundreds of thousands of Vietnamese refugees resettled in the United States. As the Migration Policy Institute documents, Vietnamese immigration to the U.S. accelerated through the late 1970s and 1980s, with communities clustering in Southern California, Texas, and the Pacific Northwest. The name itself — a tribute to the former South Vietnamese capital — became a way for these communities to preserve cultural identity in a new country.

    Food was never just sustenance in these neighborhoods. It was the fastest way to rebuild community, generate income, and maintain cultural memory. Families opened restaurants, bakeries, and grocery markets within years of arriving, often operating out of modest storefronts that looked like nothing from the outside but served food that drew lines around the block. That dynamic is still true today.

    Wikipedia’s encyclopedic overview of Little Saigon notes that the name is applied to Vietnamese enclaves across multiple U.S. cities, with Orange County’s Westminster/Garden Grove corridor being the most prominent. That area is widely recognized as the largest Vietnamese community outside Vietnam, and recognition from institutions like the James Beard Foundation and Michelin has expanded its audience well beyond the local Vietnamese-American base.

    The food here is the community’s living history. Every bowl of pho and every bánh mì reflects decades of adaptation, pride, and craft.


    Major U.S. Little Saigons worth visiting and what each does best

    The short answer: Orange County is the flagship, but you don’t have to fly to SoCal to experience a genuine Little Saigon. Here’s how the major U.S. neighborhoods stack up.

    Neighborhood Location Known for Best for
    Westminster / Garden Grove Orange County, CA Largest concentration of Vietnamese restaurants in the U.S.; pho variety, bánh mì, night markets First-time visitors; full-day food tours
    San Jose / South Bay Santa Clara County, CA Dense restaurant corridor on Story Road; strong bánh mì and bún bò Huế scene Bay Area locals; weekend lunch runs
    San Gabriel Valley Los Angeles County, CA Overlap with Chinese-Vietnamese cuisine; diverse noodle options Adventurous eaters; dim sum crossover fans
    Houston (Midtown / Bellaire) Harris County, TX Large Vietnamese population; strong pho and seafood-focused menus Southern U.S. visitors; seafood lovers
    Seattle (South Seattle) King County, WA Smaller but tight-knit; excellent bánh mì and Vietnamese sandwiches Pacific Northwest visitors
    San Diego (El Cajon Blvd.) San Diego County, CA Organized business corridor with community-listed vendors Day-trippers from SoCal
    Philadelphia Philadelphia County, PA East Coast hub; strong bánh mì shops and Vietnamese grocery culture East Coast visitors
    Orlando Orange County, FL Growing community; mix of Vietnamese and Southeast Asian food Florida visitors and theme-park travelers

    Peak times and logistics: In Orange County, weekends between 10 AM and 2 PM are the busiest windows, especially for pho and cơm tấm. Night markets in Westminster typically run on summer weekends and draw large crowds after 6 PM. Parking in OC’s Little Saigon is almost entirely strip-mall lots, which fill fast on weekends. Arriving before 11 AM or after 2 PM on weekdays is the smoothest move. San Jose’s Story Road corridor is more spread out, so a car is helpful there too.


    1. Pho: the bowl that defines Little Saigon

    Pho is the dish most people associate with Vietnamese food, and for good reason. A proper bowl starts with broth that has simmered for hours, sometimes overnight, with beef bones, charred ginger, star anise, cinnamon, and cloves. The result is a clear, deeply aromatic soup served over flat rice noodles with thin slices of beef (or chicken), a plate of fresh herbs, bean sprouts, lime, and hoisin and sriracha on the side.

    Steaming bowl of pho with fresh herbs and beef

    In Little Saigon, pho quality is taken seriously. Some spots, like Pho REDBO in Garden Grove, push the tradition further with 24-hour Wagyu bone broth, showing how the neighborhood’s best kitchens balance heritage with premium ingredients. Meanwhile, long-running family spots like Pho Quang Trung in Westminster have been serving Northern Vietnamese-style pho for decades, with a cleaner, less sweet broth than the Southern style most Americans know.

    Ordering tip: “Pho tái” means rare beef added to the hot broth tableside. “Pho bò viên” adds beef meatballs. If you want a bigger portion, ask for “tô lớn” (large bowl). Always add your herbs and squeeze lime in before the hoisin.

    Pro Tip: Order pho before 11 AM if you can. Broth is freshest at opening, and the restaurant is quieter. Many spots sell out of specialty cuts like tendon or tripe by early afternoon.


    2. Bánh mì: the sandwich that earns its own trip

    A bánh mì is a French baguette, light and crackly on the outside, filled with a combination of pork pâté, cold cuts or grilled meat, pickled daikon and carrot, cucumber, cilantro, and jalapeño. The contrast of textures and flavors in one handheld sandwich is genuinely hard to beat at any price point.

    Cross-section of bánh mì sandwich showing layers

    OC Weekly’s guide to essential Little Saigon restaurants notes that many bánh mì shops run buy-two-get-one-free deals, and sandwiches often cost just a few dollars each. That pricing isn’t a sign of low quality. It reflects a cultural norm of high volume and community accessibility that has been part of these shops since they opened.

    Ordering tip: Ask for “bánh mì đặc biệt” (the special) if you’re unsure where to start. It typically includes the full spread of meats and condiments. Tell the counter person if you want extra jalapeño or no cilantro.


    3. Cơm tấm: broken rice done right

    Cơm tấm, or broken rice, is one of the most satisfying plates in the neighborhood. The rice itself is made from grains that broke during milling, giving it a slightly softer, stickier texture than regular steamed rice. It’s topped with grilled pork chop (sườn nướng), shredded pork skin (bì), a steamed egg meatloaf (chả), a fried egg, and a small bowl of nước chấm (fish sauce dipping sauce) on the side.

    This is a working-class dish that became a neighborhood staple, and it shows up on nearly every menu in Orange County’s Little Saigon. The OC Weekly guide specifically calls it out as central to the neighborhood’s food identity.

    Ordering tip: Ask for “cơm tấm sườn bì chả” to get the full combination plate. Drizzle the nước chấm over everything, mix it in, and eat it while it’s hot.


    4. Bún thịt nướng: the cold noodle bowl you’ll crave in summer

    This dish is a room-temperature bowl of thin vermicelli rice noodles topped with charred, caramelized grilled pork, fresh lettuce, cucumber, bean sprouts, mint, pickled daikon and carrot, crushed peanuts, and fried shallots. A small cup of nước chấm comes on the side for pouring over the whole thing.

    It’s lighter than pho but just as complex in flavor. The contrast between the smoky pork, the cool herbs, and the tangy dipping sauce makes it one of the most refreshing dishes in Vietnamese cuisine, especially in warm weather.

    Ordering tip: Mix everything together before eating. Don’t be shy with the nước chấm — the whole bowl needs it.


    5. Bánh xèo: the sizzling crepe worth the mess

    Bánh xèo translates roughly to “sizzling cake,” named for the sound the batter makes when it hits the hot pan. The crepe is made with rice flour, coconut milk, and turmeric, giving it a bright yellow color and a crispy, lacy edge. Inside: shrimp, sliced pork, bean sprouts, and green onions.

    You eat it by tearing off pieces, wrapping them in lettuce or mustard greens with fresh mint and perilla, then dipping the whole bundle in nước chấm. It’s a hands-on dish, and that’s part of the fun.

    Ordering tip: Don’t wait too long to eat it. The crepe softens quickly, and the crispy edge is the best part.


    6. Chả giò: crispy spring rolls as a starter or snack

    Chả giò are deep-fried spring rolls filled with ground pork, shrimp, glass noodles, mushrooms, and shredded vegetables, all wrapped in a thin rice paper skin that fries up shatteringly crisp. They’re served with lettuce leaves, fresh herbs, and nước chấm for dipping.

    These are common as appetizers at sit-down restaurants and as quick snacks at market food courts. The texture contrast between the crunchy shell and the savory filling is what makes them so satisfying.


    7. Chè: Vietnamese dessert drinks and sweets

    Chè is a broad category covering everything from warm sweet soups to layered cold drinks. Common versions include chè ba màu (three-color dessert with red beans, mung beans, and pandan jelly in coconut milk over crushed ice), chè đậu xanh (mung bean pudding), and chè chuối (banana and tapioca in coconut milk).

    Dedicated chè shops are some of the most fun stops in any Little Saigon. You’ll often find 20 or more varieties on a handwritten menu board, and prices are typically very low per cup.

    Ordering tip: Point at what looks good in the display case if the menu feels overwhelming. Most shops are happy to let you sample before committing.


    8. Vietnamese iced coffee: the drink that fuels the whole visit

    Vietnamese iced coffee (cà phê sữa đá) is brewed through a small metal phin filter directly into a glass of sweetened condensed milk, then poured over ice. The result is intensely strong, sweet, and cold. It’s the perfect pairing for a heavy cơm tấm plate or a midday break between stops.

    Vietnamese iced coffee brewing with metal phin filter

    Egg coffee (cà phê trứng) is a newer addition to some menus, made with a whipped egg yolk and sugar foam on top of strong coffee. Worth trying if you see it.


    Where to find these dishes inside a Little Saigon neighborhood

    The four main venue types each serve a different purpose, and knowing which to choose saves time and money.

    Venue type Best for ordering Price range Insider note
    Sit-down restaurant Pho, cơm tấm, bánh xèo, family-style dishes $10–$20 per person Table service; cash preferred; tip 15–18%
    Bánh mì bakery / deli Bánh mì, pâté chaud (Vietnamese meat pastry), Vietnamese baguette $3–$7 per item Counter service; buy-two-get-one deals common
    Market food court Quick bites, bún thịt nướng, chả giò, chè $6 per item No table service; bring cash; great for sampling multiple dishes
    Dessert / chè shop Chè, shaved ice, Vietnamese drinks $3–$8 per cup Often cash only; handwritten menus; point-and-order friendly

    Diagram comparing Little Saigon venue types and offerings

    Cash vs. card: Many smaller bakeries, chè shops, and market stalls are cash-only or add a card surcharge. Bring $40–$60 in small bills for a full food tour day. Larger sit-down restaurants generally accept cards.

    How to spot the best vendors: Follow the line. The Infatuation’s guide to Little Saigon restaurants makes the point clearly: the best food often comes from nondescript strip-mall storefronts with no signage that would catch a tourist’s eye. A crowd of Vietnamese-American regulars at 11 AM on a Tuesday is the most reliable quality signal you’ll find.


    Practical tips for visiting Little Saigon: menus, ordering, and timing

    Before you walk in:

    1. Look up the restaurant’s specialty before you arrive. Many spots do one or two things exceptionally well. Ordering off-specialty at a pho house rarely ends as well as ordering the pho.
    2. Check for a “house special” or “chef’s recommendation” note on the menu, often marked with a star or written in red.
    3. Know your pho variations: “tái” (rare beef), “chín” (well-done beef), “gân” (tendon), “sách” (tripe), “bò viên” (meatballs). You can mix and match by listing them: “tái gân bò viên,” for example.

    At the counter or table:

    1. At counter-service spots, have your order ready before you reach the front. Menus are usually posted above the counter, and lines move fast.
    2. To request spiciness, say “cay” (spicy) or point to the chili sauce. Most places keep it mild by default.
    3. Sharing plates is completely normal at sit-down restaurants. Order two or three dishes for the table and share family-style.

    Payment and tipping:

    1. Tip 15–18% at full-service restaurants. Counter-service spots and market stalls don’t expect a tip, but a small one is always appreciated.
    2. If a card surcharge applies (often 3%), it’s usually posted at the register.

    Pro Tip: Strip-mall parking in Orange County’s Little Saigon fills fast on weekend mornings. Park once in a central lot and walk between stops rather than moving your car. The Westminster/Garden Grove corridor is walkable enough for a three-stop morning if you plan your route in advance.


    Sample Little Saigon food itineraries: half-day and full-day plans

    These itineraries are SoCal-focused, centered on Orange County’s Westminster/Garden Grove corridor, which is the most accessible and concentrated Little Saigon in the country.

    Half-day plan (first-timers, 3–4 hours)

    Time Stop What to order Notes
    Pho restaurant (Westminster) Pho tái gân, Vietnamese iced coffee Arrive early for fresh broth; cash preferred
    Bánh mì bakery Bánh mì đặc biệt (x2 for the deal) Buy-two-get-one deals common; eat one now, save one
    Asian Garden Mall food court Bún thịt nướng or chả giò Great for sampling; multiple vendors under one roof
    Chè shop Chè ba màu or cà phê sữa đá Cash only at most shops; perfect cool-down stop

    Vegetarian/vegan note: Most pho restaurants offer a vegetable broth pho (phở chay) on request. Bánh mì shops often carry a tofu or vegetarian filling option. Chè is largely plant-based by default.

    Full-day plan (deep-dive foodies, 6–8 hours)

    Time Stop What to order Notes
    Sit-down pho restaurant Pho tái + side of chả giò Start with the classics; Northern-style broth if available
    Bánh mì bakery Bánh mì đặc biệt + pâté chaud Stock up; these travel well for later
    Cơm tấm restaurant Cơm tấm sườn bì chả The lunch rush starts at 11:30; arrive just before
    between 1 PM and 2 PM Vietnamese supermarket (e.g., Lee’s Sandwiches area) Browse; pick up snacks, sauces, or fresh produce Great for pantry finds; air-conditioned break
    2:30–3:30 PM Bánh xèo or bún bò Huế restaurant Bánh xèo + fresh herb plate Afternoon is quieter; easier to get a table
    Chè shop or dessert café Chè ba màu, egg coffee, or shaved ice Wind down; most shops are open until 7–8 PM

    Gluten-free note: Most Vietnamese rice noodle dishes (pho, bún thịt nướng, cơm tấm) are naturally gluten-free. The main watch-out is soy sauce used in some marinades. Ask your server about the marinade on grilled meats if gluten is a concern.


    Why authentic curation matters more than star ratings in Little Saigon

    Here’s something I’ve come to believe after spending real time in these neighborhoods: the standard restaurant-rating model doesn’t serve Little Saigon well. A place that’s been open for 30 years, run by the same family, and packed with Vietnamese-American regulars every morning may have 50 reviews on a national platform and a three-star average. Meanwhile, a newer spot with a slick interior and a PR team has 500 reviews and a four-star rating. The ratings don’t tell you which bowl of pho is better.

    The Infatuation puts it plainly: ask 15 locals for the best pho in Little Saigon and you’ll get 15 different answers. That’s not a problem. That’s the point. The neighborhood’s strength is its depth and specialization, not a single consensus winner.

    What actually works is community-sourced curation: finding out which spots locals return to weekly, which bakeries have been making the same bánh mì recipe since the 1980s, and which chè shops the Vietnamese-American community itself considers the real deal. That’s the standard Socalsights uses when building food guides for Southern California. Long-running businesses, local loyalty, and walkable concentration matter more than Yelp stars.

    The other thing worth saying: Little Saigon is not a museum. It’s a living, evolving food scene. National recognition from the James Beard Foundation and Michelin has brought new visitors and pushed some restaurants to modernize, which is genuinely exciting. However, the soul of the neighborhood is still in the family-run spots that haven’t changed their menu in 20 years and don’t need to.


    Plan your Little Saigon visit with Socalsights

    Socalsights is the local guide for Southern California food experiences that actually deliver, and Little Saigon is one of the neighborhoods we cover with the most depth. Instead of sorting through hundreds of generic review-site listings, you get curated itineraries built around walkability, local loyalty, and dishes worth the trip.

    Socalsights

    Through Socalsights, you can access 100+ SoCal Sights that go well beyond the obvious tourist stops, including food corridors, night markets, and neighborhood guides across Orange County and the wider region. The local businesses directory connects you directly to the kinds of family-run spots that don’t advertise but consistently deliver the best food. If you’re planning a full day out, the daycation planning page gives you a structured framework for building a SoCal food day that actually flows. Start there, pick your neighborhood, and go eat something real.


    Sources

    These sources were selected for historical accuracy, local credibility, and practical depth. They back the claims in this guide and offer more detail for readers who want to go deeper.

  • Best Weekend Getaways from Los Angeles: 12 Top Picks

    Best Weekend Getaways from Los Angeles: 12 Top Picks

    Southern California hands you some of the country’s best short escapes right outside your door. Joshua Tree (2.5–3 hours), Catalina Island (a 75-minute ferry), Santa Barbara (90 minutes up the coast), Ojai (90 minutes inland), Palm Springs (2 hours east), Big Bear (2–2.5 hours), San Diego (2–2.5 hours south), Santa Ynez Valley (2.5 hours), Laguna Beach (1–1.5 hours), Paso Robles (3.5 hours), Temecula (1.5 hours), and Anza-Borrego (2.5–3 hours) are all weekend-ready from central LA.

    Here’s the full list at a glance so you can pick one before you finish your coffee:

    • Joshua Tree (2.5–3 hrs) — Best for: hiking, stargazing, desert photography
    • Catalina Island (75-min ferry from San Pedro) — Best for: couples, snorkeling, car-free island life
    • Santa Barbara (90 min) — Best for: beach, wine, romantic weekends
    • Ojai (90 min) — Best for: spa retreats, wellness, sunset chasers
    • Palm Springs (2 hrs) — Best for: pools, midcentury design, family fun
    • Big Bear (2–2.5 hrs) — Best for: skiing (winter), hiking (summer), families
    • San Diego (2–2.5 hrs) — Best for: beach, city culture, La Jolla sea caves
    • Santa Ynez Valley / Solvang (2.5 hrs) — Best for: wine country, quirky small towns
    • Laguna Beach (1–1.5 hrs) — Best for: art, tide pools, couples on a budget
    • Paso Robles (3.5 hrs) — Best for: wine lovers, a full 3-day trip
    • Temecula (1.5 hrs) — Best for: wineries, hot-air balloons, easy weekends
    • Anza-Borrego Desert State Park (2.5–3 hrs) — Best for: wildflowers, Font’s Point, solitude

    Key Takeaways

    The best weekend getaways from Los Angeles are almost all within a 3-hour drive, and the ones that require the most advance planning (Catalina ferry seats, Joshua Tree campsites, Temecula balloon rides) reward you most when you book early.

    Point Details
    Most picks are within 3 hours Catalina, Ojai, Laguna Beach, Temecula, Palm Springs, and Santa Barbara all work for a clean 48-hour trip.
    Book logistics before lodging Catalina ferry seats and Joshua Tree campsites fill before hotel rooms do — confirm transport first.
    Desert trips need heat planning Joshua Tree and Anza-Borrego are best October through April; summer heat advisories can close trails.
    Leave LA before 7 AM An early Friday or Saturday departure avoids the worst traffic on the 10, 101, and I-5.
    Socalsights has ready-made plans The Socalsights curated collection covers 100+ SoCal destinations with local itineraries and insider picks.

    Table of Contents

    The best weekend getaways from Los Angeles, destination by destination

    1. Joshua Tree National Park
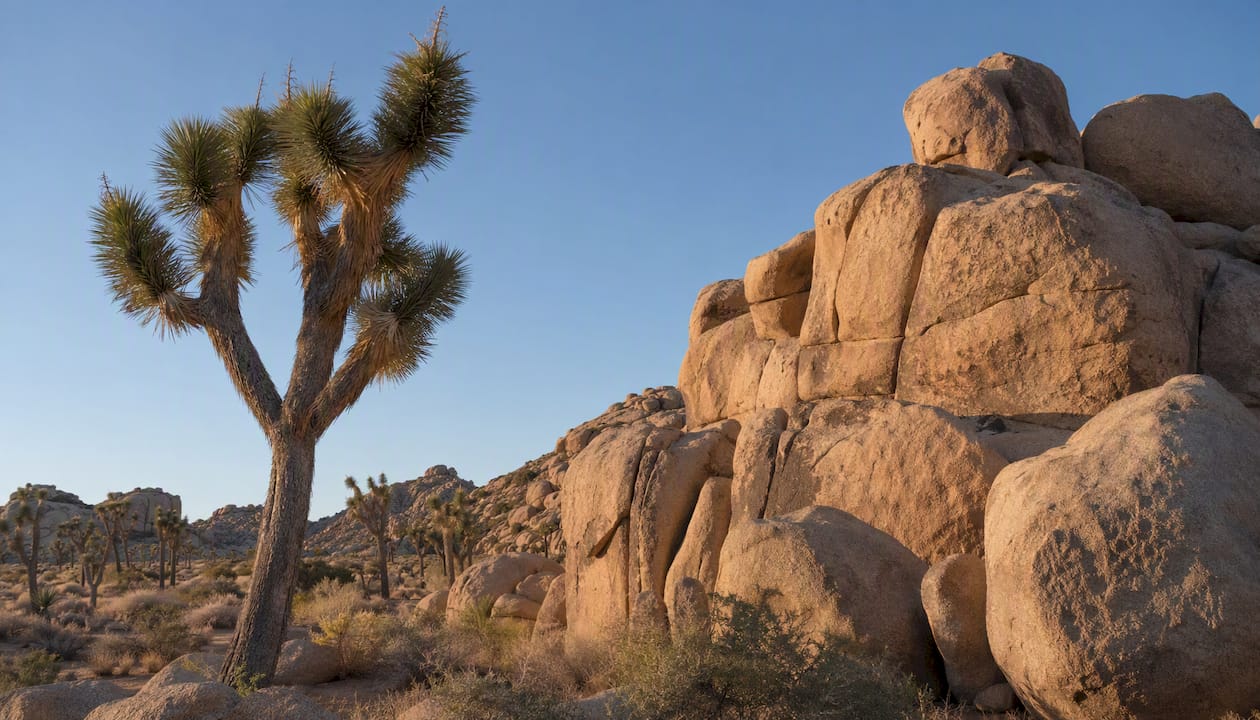
    Joshua Tree rock formations and trees

    Drive time: About 2.5–3 hours (roughly 130 miles from central LA).

    Joshua Tree is one of those places that genuinely looks different from anything else in Southern California. The park sits at the meeting point of the Mojave and Colorado deserts, which means two distinct ecosystems in one weekend. According to a detailed day-trip itinerary, a well-timed early departure can make a one-day visit feasible, but a full weekend gives you access to the best hikes and some of the darkest skies in the state.

    48-hour sample itinerary:

    1. Leave LA by 6 AM Friday to beat traffic on the 10 East
    2. Stop in Twentynine Palms for breakfast at a local diner
    3. Enter via the North Entrance; hike Skull Rock Trail (1.7 miles, easy)
    4. Afternoon: Cholla Cactus Garden and Keys View at sunset
    5. Night: stargazing from your campsite or a dark-sky spot near Jumbo Rocks
    6. Day 2: Barker Dam Trail in the morning, then explore Joshua Tree town for coffee and art galleries before heading home

    Where to stay: Jumbo Rocks Campground (reserve on recreation.gov well in advance), or stay in the town of Joshua Tree for boutique desert rentals and quirky motels.

    Best season: October through April. Summer temperatures regularly exceed 100°F, and the NPS issues heat advisories that can close trails.

    Packing tip: Carry at least one gallon of water per person per day. Cell service is limited inside the park, so download offline maps before you leave.

    Pro Tip: Book Jumbo Rocks campsites 6 months out if you’re going in spring. The wildflower season (February through April) draws huge crowds, and walk-in spots disappear by Thursday afternoon.


    2. Catalina Island (Avalon and Two Harbors)
    Calm Avalon Harbor on Catalina Island

    Getting there: Catalina Express ferries run from San Pedro, Long Beach, and Dana Point. The crossing takes roughly 75 minutes to Avalon. Regional roundups consistently flag Catalina’s ferry logistics as the single most important planning step: book your outbound seat and confirm your return schedule before you book a hotel room.

    48-hour sample itinerary:

    1. Catch the first morning ferry (usually 6–7 AM departure)
    2. Avalon: rent a golf cart, walk the Casino Ballroom, snorkel at Lover’s Cove
    3. Afternoon kayaking or a glass-bottom boat tour
    4. Dinner on Crescent Avenue; overnight at a hotel in Avalon
    5. Day 2: hike the Trans-Catalina Trail segment toward Two Harbors, or take the ferry shuttle to Two Harbors for a quieter, wilder experience
    6. Return ferry in the late afternoon

    Where to stay: Avalon has a range of hotels from budget to boutique. Two Harbors has a campground and a small inn for a more off-grid feel.

    Best season: May through October for warm water and calm crossings. Winter weekends are quieter and cheaper, but some ferry schedules reduce.

    Packing tip: No personal cars are allowed in Avalon. Pack light, bring layers for the ferry crossing, and leave the big suitcase at home.


    3. Santa Barbara

    Drive time: About 90 miles north of LA via the 101 or the Pacific Coast Highway. Without heavy traffic, you’re looking at 90–120 minutes. The PCH route adds time but is genuinely one of the prettiest drives in the state.

    Santa Barbara earns its “American Riviera” nickname. Spanish Colonial architecture, a walkable State Street, the Funk Zone wine-tasting district, and clean beaches make it one of the most complete short escapes from LA.

    48-hour sample itinerary:

    1. Drive up Saturday morning; stop at El Capitan State Beach on the way
    2. Lunch in the Funk Zone (local wine bars and food trucks)
    3. Walk State Street, visit the Santa Barbara County Courthouse for rooftop views
    4. Stearns Wharf at sunset; dinner on the waterfront
    5. Day 2: East Beach in the morning, then the Santa Barbara Botanic Garden or the Mission
    6. Drive home via the PCH for a scenic return

    Where to stay: The Funk Zone and lower State Street have boutique hotels. Goleta has more budget-friendly chain options a few miles from downtown.

    Best season: April through November. June gloom can bring morning fog, but it usually burns off by noon.

    Packing tip: Bring a light jacket for evenings, even in summer. The ocean breeze drops the temperature fast after sunset.


    4. Ojai

    Drive time: About 90 minutes from LA, making it one of the closest true escapes on this list.

    Ojai is a small valley town that punches well above its size. It’s known for wellness retreats, the Ojai Valley Trail (9.5 miles, paved and easy), a walkable downtown with independent shops, and the famous “pink moment” — the glow that settles on the Topa Topa Mountains at sunset. Local guides describe it as a 90-minute drive that feels like a full reset.

    48-hour sample itinerary:

    1. Arrive Saturday midday; grab lunch at a farm-to-table spot on Ojai Avenue
    2. Afternoon: bike the Ojai Valley Trail or browse the Ojai Art Center
    3. Sunset: position yourself on Signal Street or the Ojai Valley Inn lawn for the pink moment
    4. Day 2: morning spa treatment or yoga class, then a short hike in the Los Padres National Forest foothills
    5. Pick up local olive oil or honey at the Sunday farmers market before heading home

    Where to stay: The Ojai Valley Inn is the splurge option (full spa, golf, beautiful grounds). Mid-range: several small inns and vacation rentals along the valley floor.

    Best season: Spring and fall are ideal. Summer gets warm but evenings cool down nicely. Avoid holiday weekends if you want a quiet retreat.

    Packing tip: Comfortable walking shoes and a reusable water bottle. Ojai is very walkable, and the farmers market is worth arriving early for.


    5. Palm Springs

    Drive time: About 2 hours from LA via the 10 East.

    Palm Springs is the easiest “feels like a real vacation” destination on this list. Midcentury modern architecture, a strong arts scene, the Palm Springs Aerial Tramway (which drops you into alpine terrain at 8,516 feet), and more pools per capita than almost anywhere in the country. It’s genuinely great for families, couples, and solo travelers.

    48-hour sample itinerary:

    1. Arrive Friday evening; check into your hotel and hit the pool
    2. Saturday: Palm Springs Art Museum in the morning, then the Aerial Tramway
    3. Afternoon: walk the Palm Canyon Drive strip, browse vintage shops
    4. Sunday: Indian Canyons hike (Agua Caliente Band of Cahuilla Indians tribal land — day-use fee required), then brunch before heading west

    Where to stay: Uptown Design District for boutique hotels with personality. Downtown for walkability. Budget travelers do well with the many mid-century motel conversions.

    Best season: October through April. Summer highs regularly hit 110°F+, though hotel rates drop significantly and some travelers love the heat.

    Packing tip: Sunscreen, a hat, and a refillable water bottle are non-negotiable. If you’re hiking Indian Canyons, bring cash for the entry fee.


    6. Big Bear Lake

    Drive time: 2–2.5 hours from LA via the 10 East to Highway 18 or Highway 38.

    Big Bear works in every season. Winter brings skiing and snowboarding at Bear Mountain and Snow Summit. Summer opens up mountain biking, kayaking on the lake, and hiking through the San Bernardino National Forest. The Angeles National Forest USFS pages are the authoritative source for trail conditions and campground availability in the broader San Gabriel and San Bernardino mountain areas.

    48-hour sample itinerary:

    1. Drive up Saturday morning (leave by 7 AM to avoid weekend traffic on the mountain roads)
    2. Winter: ski or snowboard at Bear Mountain; rent gear on-site
    3. Summer: rent a kayak on Big Bear Lake, then hike Castle Rock Trail (2 miles, moderate)
    4. Evening: dinner in Big Bear Village
    5. Day 2: Stanfield Cutoff for lake views, then a leisurely drive down Highway 18 (Rim of the World Drive) on the way home

    Where to stay: Big Bear Village has cabins, vacation rentals, and a few hotels. Camping at Serrano Campground (on the lake) is a great summer option.

    Best season: December through March for snow sports; June through September for lake and hiking. Avoid the first big snow weekend of the season — the traffic backup on Highway 18 can be brutal.

    Packing tip: In winter, carry chains or have an AWD vehicle. Check Caltrans road conditions before you leave LA.

    Pro Tip: Highway 38 from Redlands is a longer route but far less congested than the 18 on busy winter weekends. Add 20 minutes and save yourself an hour of gridlock.


    7. San Diego

    Drive time: 2–2.5 hours from LA via the I-5 South.

    San Diego is the most complete city escape on this list. You get beaches (Pacific Beach, Mission Beach, Coronado), a world-class zoo, the historic Gaslamp Quarter, La Jolla’s sea caves and Torrey Pines State Natural Reserve, and one of the best craft beer scenes in the country. It’s easy to fill three days without repeating yourself.

    48-hour sample itinerary:

    1. Arrive Friday evening; dinner in Little Italy or the Gaslamp Quarter
    2. Saturday: Torrey Pines State Reserve hike in the morning (go early — parking fills fast), then La Jolla Cove for sea lions and kayaking
    3. Afternoon: Balboa Park museums or the San Diego Zoo
    4. Day 2: Coronado Island via the ferry from downtown, then Coronado Beach before heading north

    Where to stay: Little Italy for walkable restaurants and nightlife. La Jolla for a quieter, upscale beach vibe. Mission Beach for a classic SoCal beach-town feel.

    Best season: Year-round, honestly. May and June bring morning fog (“June gloom”), but July through October is reliably sunny and warm.

    Packing tip: Bring layers for the morning coastal fog. If you’re hiking Torrey Pines, go before 9 AM on weekends — the lot fills and they close the entrance.


    8. Santa Ynez Valley and Solvang

    Drive time: About 2.5 hours from LA via the 101 North.

    The Santa Ynez Valley is California wine country without the Napa price tag. Solvang is the Danish-village anchor of the valley — windmills, aebleskiver (Danish pancake puffs), and a genuinely charming main street. Los Olivos has tasting rooms on every block. Buellton is the gateway town with more casual dining and a few good breweries.

    48-hour sample itinerary:

    1. Drive up Saturday morning; stop in Buellton for breakfast
    2. Los Olivos: walk the tasting rooms on Grand Avenue (no reservations needed at most)
    3. Afternoon: drive to Solvang for aebleskiver and a stroll through the village
    4. Dinner at a Santa Ynez Valley winery restaurant; overnight in Solvang or Los Olivos
    5. Day 2: Foxen Canyon Wine Trail for a more rural, less touristy tasting experience; head home via the 101

    Where to stay: Solvang has several inns and a few boutique hotels. Los Olivos has a small luxury inn. Budget option: Santa Maria (15 minutes away) has chain hotels at lower rates.

    Best season: April through November. Harvest season (September through October) is the most atmospheric but also the busiest.

    Packing tip: Designate a driver or use a wine-country shuttle service. The roads between wineries are narrow and rural.


    9. Laguna Beach

    Drive time: 1–1.5 hours from LA via the I-5 South or the Pacific Coast Highway.

    Laguna Beach is the closest true beach-art town escape from LA. The Pageant of the Masters (July through August) is unlike anything else in Southern California. The tide pools at Crystal Cove State Park are some of the best in the state. And the stretch of PCH through Laguna is one of those drives you want to take slowly.

    48-hour sample itinerary:

    1. Arrive Saturday morning; park in the village and walk to Main Beach
    2. Afternoon: tide pools at Crystal Cove State Park (a few miles north of downtown Laguna)
    3. Browse the galleries on Forest Avenue; dinner at a restaurant overlooking the water
    4. Day 2: hike the Laguna Coast Wilderness Park trails (Nix Nature Center is a good starting point), then a late lunch before heading home

    Where to stay: Downtown Laguna has boutique hotels and inns within walking distance of the beach. Budget option: stay in Dana Point (10 minutes south) and drive in.

    Best season: September through November, when summer crowds thin and the water is still warm. Summer is beautiful but parking is a genuine challenge.

    Packing tip: Arrive before 9 AM on summer weekends or use the village trolley system to avoid the parking nightmare.


    10. Paso Robles

    Drive time: About 3.5 hours from LA via the 101 North. It’s the furthest pick on this list, but it earns a spot for a full 72-hour trip.

    Paso Robles is California’s most underrated wine region. Over 200 wineries, a charming downtown square, and a food scene that has quietly become one of the best on the Central Coast. The Westside has older Zinfandel vines; the Eastside runs warmer and produces bold Cabernets. Travel roundups consistently flag Paso as weekend-feasible when planned as a full 48–72 hour trip.

    72-hour sample itinerary:

    1. Drive up Friday afternoon; arrive for dinner on the downtown square
    2. Saturday: Westside wineries in the morning (Tablas Creek, Linne Calodo); picnic lunch at a vineyard
    3. Afternoon: downtown Paso for olive oil tasting and local cheese shops
    4. Day 3: Eastside wineries, then drive home via the 101 (or detour through Morro Bay for a coastal finish)

    Where to stay: Downtown Paso has boutique hotels and inns. Wine country vacation rentals are plentiful and often the best value for groups.

    Best season: April through October. Harvest (September through October) is spectacular but book lodging months in advance.

    Packing tip: Bring a cooler for wine purchases. Most wineries charge a small tasting fee; many waive it with a bottle purchase.


    11. Temecula

    Drive time: About 1.5 hours from LA via the I-15 South.

    Temecula is the closest wine country to LA, and it’s genuinely fun even if wine isn’t your main interest. Hot-air balloon rides over the vineyards at sunrise are a bucket-list experience. Old Town Temecula has good restaurants and a lively weekend scene. The wineries along Rancho California Road are easy to navigate without a tour.

    48-hour sample itinerary:

    1. Arrive Friday evening; dinner in Old Town Temecula
    2. Saturday: hot-air balloon ride at sunrise (book well in advance — these sell out on weekends)
    3. Late morning: wine tasting along Rancho California Road (several wineries are walkable from each other)
    4. Afternoon: pool time at your hotel or a visit to the Pechanga Resort Casino
    5. Day 2: a final tasting room or two, then head home before Sunday afternoon traffic builds on the I-15

    Where to stay: Several hotels sit right in the wine country corridor. Old Town Temecula has boutique options. Budget: chain hotels near the I-15 interchange.

    Best season: Spring (March through May) and fall (September through November). Summer gets hot, and the I-15 on Sunday afternoons can be brutal.

    Packing tip: Book the balloon ride the moment you confirm your dates. They fill up weeks out, especially in spring.


    12. Anza-Borrego Desert State Park

    Drive time: About 2.5–3 hours from LA via the I-15 South to Highway 78.

    Anza-Borrego is California’s largest state park, and it’s one of the most undervisited places within three hours of LA. Font’s Point offers a view over the Borrego Badlands that genuinely stops people mid-sentence. The wildflower bloom (February through March in a good rain year) draws visitors from across the country. The park has almost no light pollution, making it a serious stargazing destination.

    48-hour sample itinerary:

    1. Leave LA early Saturday; arrive in Borrego Springs by mid-morning
    2. Drive to Font’s Point (4WD recommended for the sandy road; check conditions first)
    3. Afternoon: Slot Canyon hike near Borrego Palm Canyon
    4. Sunset from the Borrego Springs town center; dinner at a local restaurant
    5. Day 2: Borrego Palm Canyon Trail (3 miles round-trip to a palm oasis), then head home

    Where to stay: Borrego Springs has a small inn and vacation rentals. Camping at Borrego Palm Canyon Campground is the most atmospheric option.

    Best season: November through March. Summer temperatures in Anza-Borrego regularly exceed 110°F and the park issues heat advisories that close trails.

    Packing tip: Carry extra water, a paper map, and a portable charger. Cell service is essentially nonexistent in most of the park.

    How to pick the right weekend escape from LA

    The destination list is the easy part. Matching it to your actual weekend is where most people get tripped up. Here’s a quick framework:

    Start with your time window:

    1. 48 hours (Friday night to Sunday afternoon): Stick to destinations within 2.5 hours. Catalina, Ojai, Laguna Beach, Temecula, Palm Springs, and Santa Barbara all work cleanly.
    2. 72 hours (Friday morning to Sunday evening): You can reach Paso Robles, Santa Ynez Valley, and San Diego comfortably and still have time to breathe.
    3. Day trip only: Joshua Tree, Ojai, Laguna Beach, and Temecula are all feasible as long day trips, though you’ll get more out of each with an overnight.

    Match your mood to the destination:

    • Relaxation and spa: Ojai, Palm Springs, Santa Barbara
    • Active and outdoorsy: Joshua Tree, Big Bear, Anza-Borrego, Torrey Pines
    • Wine and food: Paso Robles, Temecula, Santa Ynez Valley
    • Beach and sun: Laguna Beach, Santa Barbara, San Diego, Catalina
    • Family-friendly: Big Bear, San Diego, Palm Springs
    • Romantic: Catalina, Ojai, Santa Barbara, Paso Robles

    Practical questions to ask before you book:

    • Do I need a permit or reservation? Joshua Tree campsites, Torrey Pines parking, and Catalina ferry seats all require advance booking.
    • Is 4WD necessary? Font’s Point in Anza-Borrego and some Big Bear winter roads require it.
    • What’s the weather doing? Desert destinations (Joshua Tree, Anza-Borrego, Palm Springs) are genuinely dangerous in summer heat. Check NPS advisories.
    • When should I leave LA? For most destinations, leaving before 7 AM on Friday or Saturday avoids the worst of the 10, 101, and I-5 traffic.

    Common pitfalls to avoid:

    • Booking lodging before confirming ferry seats (Catalina)
    • Underestimating Big Bear traffic on the first snow weekend of the season
    • Arriving at Torrey Pines or Joshua Tree after 10 AM on a holiday weekend and finding parking closed
    • Skipping the Sunday afternoon departure window — leaving any destination after 3 PM on Sunday means sitting in traffic for an extra hour or two

    Insider tips and lesser-known picks from Socalsights

    The destinations above are the crowd-pleasers. These are the ones worth knowing about if you want something a little different.

    Lesser-known picks worth the drive:

    • Idyllwild (2 hours via the 10 East and Highway 243): A pine-forest mountain town above Palm Springs with great hiking, a strong arts community, and almost no crowds compared to Big Bear. The Tahquitz Rock climbing area draws serious climbers; the town itself is perfect for a slow, bookshop-and-coffee weekend.
    • Pioneertown (2.5 hours): A 1940s-era movie set town near Joshua Tree that still functions as a living community. Pappy & Harriet’s Pioneertown Palace hosts live music on weekends and serves surprisingly good BBQ. Pair it with a Joshua Tree visit for a differentiated two-day plan.
    • Cambria (4 hours via the 101): Further than most picks here, but the drive up the PCH past Morro Bay is worth it. Moonstone Beach is quieter than any beach within two hours of LA, and the town has excellent seafood.
    • Lake Arrowhead (2 hours): Big Bear’s quieter neighbor. Less ski infrastructure, more lakeside cabin vibes. Great for a low-key winter weekend without the Bear Mountain crowds.
    • Borrego Springs town (2.5 hours): Most visitors drive through on the way to Font’s Point. The town itself has a small but excellent restaurant scene and the metal sculpture installations scattered across the desert (free, open 24 hours) are genuinely worth an afternoon.
    • Malibu Creek State Park (45 minutes from central LA): Technically a day trip, but the campground here is one of the most underused spots within an hour of the city. The MAS*H filming location trail is an easy 4-mile round-trip.

    Micro-itinerary: Joshua Tree + Pioneertown (2 days)

    1. Day 1: Drive to Pioneertown; lunch at Pappy & Harriet’s; afternoon exploring the old movie-set streets
    2. Evening: live music at Pappy’s (check the schedule in advance — it fills up)
    3. Day 2: Enter Joshua Tree via the West Entrance (closest to Pioneertown); hike Barker Dam Trail; Keys View at sunset; drive home

    Micro-itinerary: Ojai + Lake Casitas (2 days)

    1. Day 1: Ojai farmers market (Sunday mornings); lunch on Ojai Avenue; afternoon hike in Los Padres foothills
    2. Evening: pink moment at the Ojai Valley Inn lawn
    3. Day 2: Lake Casitas Recreation Area (10 minutes from Ojai) for kayaking or a lakeside picnic; drive home via the 33 through Ventura for a scenic coastal finish

    Pro Tip: Socalsights keeps a running collection of 100+ SoCal sights that goes well beyond the usual lists. If you want to find the spots that don’t show up on the first page of Google, that’s the place to start.

    Parking and crowd hacks:

    • At Laguna Beach: the village trolley runs on summer weekends and costs almost nothing. Park once at a peripheral lot and ride in.
    • At Joshua Tree: the Cottonwood Entrance (south side) is consistently less crowded than the West or North entrances on busy weekends.
    • At Torrey Pines: the upper lot fills by 9 AM on weekends. The lower lot near the beach is often overlooked and has more space.

    What to eat: dining highlights by destination

    Food is half the reason to leave LA, honestly. Here’s what to prioritize at each stop.

    Joshua Tree and Twentynine Palms: The town of Joshua Tree has a small but solid food scene. Crossroads Café is a local favorite for breakfast before you hit the park. Twentynine Palms has a handful of diners and a growing number of creative spots catering to the influx of desert visitors.

    Catalina Island: Avalon’s Crescent Avenue has seafood restaurants with ocean views. The Lobster Trap is a longtime local favorite for fresh catch. Two Harbors has a single restaurant and bar at the harbor — simple food, but the setting is hard to beat.

    Santa Barbara: The Funk Zone is where you want to eat. It’s a compact neighborhood of converted warehouses with wine bars, tacos, and farm-to-table spots all within walking distance. The Santa Barbara Public Market on Chapala Street is a good spot for a casual lunch with multiple vendors under one roof.

    Ojai: The Ojai Beverage Company has a great local beer selection and a relaxed patio. Azu Restaurant on Ojai Avenue is a local institution for Mediterranean-influenced California cuisine. The Sunday farmers market is worth timing your trip around.

    Palm Springs: The Uptown Design District has the most interesting restaurant concentration. Cheeky’s is a weekend brunch institution (expect a line). Sherman’s Deli has been a Palm Springs staple since 1963 and is worth the stop for a classic deli sandwich.

    Big Bear: Big Bear Village has a mix of casual spots. Peppercorn Grille is a reliable dinner option. For breakfast, the local diners along Village Drive open early and fill up fast on ski weekends.

    San Diego: Little Italy is the strongest food neighborhood for a weekend visit. The Gaslamp Quarter has more nightlife. For a local experience, the Barrio Logan neighborhood has excellent taquerias and a strong arts scene. Coronado has a handful of good waterfront restaurants worth the ferry ride.

    Santa Ynez Valley / Solvang: Solvang’s aebleskiver (from the Solvang Restaurant or Paula’s Pancake House) is the thing to eat here. Los Olivos has the Sides Hardware and Shoes restaurant, which is one of the best farm-to-table spots in the valley. Buellton’s Industrial Eats is a wood-fired pizza spot that locals love.

    Laguna Beach: Nick’s Laguna Beach on PCH has a great ocean view and solid California cuisine. The Cliff Restaurant is the classic sunset-dinner spot. For casual, the taco trucks near the village are excellent and cheap.

    Paso Robles: The downtown square has a strong restaurant cluster. Hatch is a local favorite for breakfast. Thomas Hill Organics is the go-to for a farm-to-table dinner. The Paso Robles Olive Market on the square sells local oils and tapenades worth bringing home.

    Temecula: Old Town Temecula has a good mix of restaurants. The Gambling Cowboy Alehouse is a popular local spot. Most of the wineries along Rancho California Road have their own restaurants or food trucks on weekends.

    Anza-Borrego / Borrego Springs: The Carlee’s Place restaurant in Borrego Springs is the local gathering spot. Options are limited, so stock up on groceries in Borrego Springs before heading into the park.

    Socalsights curated guides and itineraries

    Planning a weekend getaway from LA shouldn’t take longer than the trip itself. Socalsights cuts through the noise with curated local guides built by people who actually live and travel in Southern California.

    Socalsights

    The Socalsights adventure overview gives you a ready-made starting point for any of the destinations above, with photo-led route ideas and local business recommendations you won’t find on a generic travel site. If you want to go deeper, the Socalsights membership unlocks extended collections, printable 48-hour itineraries, and insider picks from the local community. Browse the full SoCal sights collection to find your next weekend escape, or check the local business directory for vetted spots at each destination.

    Useful planning resources

    Before you finalize any of these trips, bookmark the official sources below. Conditions, permits, and schedules change, and a five-minute check before you leave can save a wasted drive.

    Check official NPS and state park pages directly for last-minute closures, heat advisories, or permit changes before any desert or mountain trip.

    The trips most people plan wrong (and how to fix it)

    Most weekend getaway guides from LA treat every destination as equally accessible and equally forgiving. They’re not, and that gap between the list and the reality is where most trips go sideways.

    The single most common mistake is treating drive time as the only planning variable. Two hours to Palm Springs on a Tuesday morning is a completely different experience from two hours to Palm Springs on a Friday afternoon in February. The I-10 East on a winter Friday, when half of LA is heading to the desert, can add 90 minutes to that drive. The same logic applies to Big Bear on the first snow weekend of the year and to Catalina on a summer Saturday when the ferry is sold out by Wednesday.

    The second mistake is underestimating the permit and reservation layer. Joshua Tree’s most popular campsites require booking months in advance during spring wildflower season. Torrey Pines parking closes when the lot fills, which happens before 9 AM on busy weekends. Anza-Borrego’s Font’s Point road requires 4WD and conditions can make it impassable after rain. None of these are deal-breakers, but they’re the kind of detail that turns a great trip into a frustrating one if you find out about them in the parking lot.

    The third mistake is skipping the lesser-known alternatives when the main destination is at capacity. Idyllwild when Big Bear is packed. Lake Casitas when Ojai is booked solid. Pioneertown when Joshua Tree’s campsites are gone. The SoCal region has enough depth that you almost never have to settle for a crowded version of your first choice.

    What actually makes a weekend getaway work from LA is simple: pick a destination that matches your time window, book the logistics that have limited availability first, and leave early enough to arrive before the crowds do. The rest takes care of itself.

    Sources

  • San Diego’s Secret Beaches: A Local Insider Guide

    San Diego’s Secret Beaches: A Local Insider Guide

    San Diego’s genuinely secret beaches come down to a short list: Black’s Beach, Tide Beach Park, Border Field State Park, Windansea Beach, Swami’s/Boneyards, Silver Strand, South Ponto, and Garbage Beach. What keeps them quiet isn’t magic — it’s hard access, tide dependency, or sheer distance from the tourist corridor.

    Here’s the quick rundown so you can pick your spot fast:

    • Black’s Beach — San Diego’s most famous clothing-optional stretch, tucked below 300-foot cliffs with no easy road access. Best for: nude sunbathing, surf watching, solitude.
    • Tide Beach Park (Solana Beach) — A below-the-bluff gem that literally disappears at high tide. Best for: tidepooling, quiet mornings.
    • Border Field State Park — The southernmost U.S. beach, more than 1.5 miles of sand with almost no crowds. Best for: horseback riding, birding, wide-open space.
    • Windansea Beach — A reef-break surfer’s spot that naturally filters out non-surfers. Best for: surf watching, photography.
    • Swami’s / Boneyards — A legendary surf point with a steep staircase that keeps casual visitors away. Best for: surfing, watching pros, sunrise.
    • Silver Strand State Beach — A narrow barrier island beach between the bay and ocean, popular with locals but rarely packed. Best for: calm water, families, long walks.
    • South Ponto Beach — A low-key Carlsbad stretch just south of the main Ponto lot. Best for: quiet sunbathing, off-leash dogs (check current rules).
    • Garbage Beach / AB’s — A local nickname for a rocky, reef-heavy stretch near Encinitas that rewards those who know it. Best for: tidepooling, surf photography.
    • La Jolla Shores / La Jolla Cove — Not secluded on their own, but the long low-tide walk north toward Black’s Beach is one of San Diego’s great hidden routes.

    Pro Tip: The single best predictor of a quiet visit is arriving before 9 AM on a weekday. Even Windansea feels like your private cove at 7 AM on a Tuesday.


    Key Takeaways

    San Diego’s most secluded beaches stay quiet because of hard access, tide dependency, or remote location — and that same difficulty is what makes safety planning non-negotiable before you go.

    Point Details
    Top secluded picks Black’s Beach, Tide Beach Park, Border Field, and South Ponto offer the most genuine solitude.
    Tide check is mandatory For Black’s Beach and Tide Beach Park, high tide can block your exit; check NOAA charts before every visit.
    Arrive before 9 AM Early arrival is the single most reliable tactic for beating crowds at any of these spots.
    Leave no trace Pack out all trash, avoid geotagging exact locations, and stay on marked trails to protect these spots.
    Socalsights guide The Socalsights daycation and adventure guides include parking pins, tide windows, and local tips for hidden SoCal beaches.

    Table of Contents

    At a glance: quick facts for every secret beach

    Before you pack the cooler, here’s what you need to know about parking, access, and timing for each spot.

    Fees: Border Field State Park and Silver Strand State Beach both charge a day-use vehicle fee. Torrey Pines Gliderport lot is free, but space is limited. Most other spots rely on street parking, which fills quickly on weekends.

    Pro Tip: For Windansea, park on Nautilus Street or Gravilla Street rather than the tiny lot directly at the beach. You’ll save time and avoid the weekend parking scramble.


    The secret beaches of San Diego, one by one

    Rocky trail to secluded San Diego beach

    Black’s Beach

    Black’s Beach sits at the base of 300-foot sandstone cliffs in Torrey Pines, and its remoteness and difficult access keep it largely uncrowded while preserving a clothing-optional tradition that’s been part of the local culture for decades. Getting there requires either a steep, unmaintained trail from the Torrey Pines Gliderport or a long low-tide walk from Torrey Pines State Beach to the south or La Jolla Shores to the north.

    • What makes it secluded: Cliff-only access, no facilities, no lifeguards
    • Parking: Torrey Pines Gliderport lot (free, limited) or Torrey Pines State Beach lots (fee)
    • Access difficulty: Steep trail (use caution) or long low-tide walk
    • Facilities: None on the beach
    • Lifeguard: None
    • Best time: Low tide, weekday mornings, spring through fall
    • Family-friendly: No (steep access, no facilities, clothing-optional)
    • Best for: Solitude, nude sunbathing, surf watching

    Access routes include the Glider Port Trail and low-tide walks from Torrey Pines or La Jolla Shores, but the cliffs are unstable and the beach is frequently unpatrolled. Treat this one with respect.

    Tide Beach Park

    Tide Beach Park is a wild, below-the-bluff beach that can disappear entirely at high tide, accessible only by a steep staircase cut into the bluff. At low tide, the reef opens up into some of the best tidepooling in North County San Diego, and you’ll often have it nearly to yourself.

    • What makes it secluded: High tide covers most of the sand; staircase-only access
    • Parking: Street parking along Solana Beach residential streets
    • Access difficulty: Steep staircase (moderate fitness required)
    • Facilities: None
    • Lifeguard: None
    • Best time: Low tide only; early morning for the best light and fewest people
    • Family-friendly: With older kids who can manage stairs
    • Best for: Tidepooling, quiet mornings, nature photography

    Torrey Pines State Beach

    Torrey Pines State Beach stretches about 4.5 miles of wide, sandy shoreline backed by those iconic red-hued bluffs. It’s less a secret and more a gateway: the northern end of this beach is where the long low-tide walk to Black’s Beach begins, and the Gliderport trail drops down from the bluff above. The beach itself stays quieter than Mission Beach or Pacific Beach simply because of its length and the lack of boardwalk amenities.

    • What makes it secluded: Length and distance from tourist infrastructure
    • Parking: Multiple lots along Torrey Pines Road (fee)
    • Access difficulty: Easy flat walk
    • Facilities: Restrooms at parking areas
    • Lifeguard: Seasonal
    • Best time: Year-round; early morning for solitude
    • Family-friendly: Yes
    • Best for: Long walks, access to Black’s Beach, kite flying

    Windansea Beach

    Windansea is a reef-break surf spot in La Jolla that San Diego Magazine notes as one of the city’s quieter options, largely because the rocky reef and strong surf naturally discourage casual swimmers. The thatched surf shack on the sand is a local landmark, and the vibe here is distinctly local.

    • What makes it secluded: Rocky reef, strong surf, no amenities
    • Parking: Street parking on Nautilus St or Gravilla St
    • Access difficulty: Easy
    • Facilities: None
    • Lifeguard: Seasonal
    • Best time: Early morning, any season
    • Family-friendly: Limited (rocky entry, strong surf)
    • Best for: Surf watching, photography, local atmosphere

    Swami’s State Beach and Boneyards

    Swami’s is a world-class surf break in Encinitas, named after the Self-Realization Fellowship temple perched on the bluff above. Boneyards is the reef section just south of the main break, even more exposed and rocky. A steep staircase is the only way down, which keeps the beach population small even when the surf is pumping.

    • What makes it secluded: Steep staircase, reef-heavy, surf-focused crowd
    • Parking: Small lot off South Coast Highway 101
    • Access difficulty: Steep staircase
    • Facilities: Restrooms near the lot
    • Lifeguard: None
    • Best time: Low tide for Boneyards; dawn for solitude
    • Family-friendly: No (rocky, steep access)
    • Best for: Surfing, watching pros, sunrise photography

    Pro Tip: The staircase at Swami’s opens early. If you arrive at first light on a winter morning during a south swell, you might share the beach with just a handful of surfers and a pelican or two.

    Silver Strand State Beach

    Silver Strand is a narrow barrier island connecting Coronado to Imperial Beach, with the Pacific on one side and San Diego Bay on the other. It’s a legitimate less-crowded San Diego beach that most tourists skip entirely because it lacks the boardwalk scene. The bay side is calm and shallow, perfect for families.

    • What makes it secluded: Distance from downtown, no boardwalk scene
    • Parking: Silver Strand lot (fee)
    • Access difficulty: Easy
    • Facilities: Restrooms, outdoor showers
    • Lifeguard: Seasonal
    • Best time: Weekdays, spring and fall
    • Family-friendly: Yes
    • Best for: Calm swimming, long walks, kite flying

    South Ponto Beach

    South Ponto sits just south of the main Ponto Beach lot in Carlsbad, and it’s the kind of spot that locals drive past the crowded lot to reach. The sand is wide, the waves are consistent, and the crowd is a fraction of what you’ll find at Carlsbad State Beach a mile north.

    • What makes it secluded: Separate lot, less visible from the main road
    • Parking: South Ponto lot off Carlsbad Boulevard
    • Access difficulty: Easy
    • Facilities: Restrooms nearby
    • Lifeguard: None
    • Best time: Early morning, weekdays
    • Family-friendly: Yes
    • Best for: Quiet sunbathing, beginner surfing, sunsets

    Border Field State Park

    Border Field State Park stretches more than 1.5 miles along the southernmost tip of the U.S. coastline, ending at the border fence with Mexico. Its remote location keeps crowds minimal, and it’s the one San Diego beach where horseback riding is a genuine option. The estuary behind the beach is a birding hotspot.

    • What makes it secluded: Remote border location, limited infrastructure
    • Parking: Border Field lot (day-use fee)
    • Access difficulty: Easy flat walk from lot
    • Facilities: Restrooms
    • Lifeguard: Seasonal
    • Best time: Weekday mornings, spring for birding
    • Family-friendly: Yes (flat, open)
    • Best for: Horseback riding, birding, wide-open solitude

    Garbage Beach / AB’s

    “Garbage Beach” is a local nickname for a rocky, reef-covered stretch near Encinitas that doesn’t appear on most tourist maps. The name comes from the kelp and debris that washes up on the reef, not from any actual trash. It’s a favorite among surf photographers and tidepoolers who know exactly where to scramble down.

    • What makes it secluded: No official access, rocky scramble required
    • Parking: Street parking in Encinitas
    • Access difficulty: Moderate rocky scramble
    • Facilities: None
    • Lifeguard: None
    • Best time: Low tide only
    • Family-friendly: No
    • Best for: Tidepooling, surf photography, local exploration

    What you need to know about safety and access risks

    Seclusion and risk go hand in hand at most of these spots. The same features that keep crowds away — steep cliffs, tide-dependent access, no facilities — are the features that can turn a great day into a dangerous one.

    The main hazards:

    • Cliff erosion: The sandstone bluffs at Black’s Beach and Tide Beach Park are actively eroding. Never stand or sit directly below them.
    • Tide entrapment: At Black’s Beach and Tide Beach Park, high tide can cut off your exit route entirely. Checking a local tide chart before you go is a safety requirement, not a suggestion.
    • No lifeguards: Most of these beaches have no lifeguard coverage. You’re responsible for your own safety in the water.
    • Slippery surfaces: Algae-covered reef rock at Garbage Beach, AB’s, and Tide Beach Park can be extremely slippery. Grippy footwear matters.
    • Trail erosion: Unmaintained trails to spots like Black’s Beach erode quickly. Some local guides have stopped publishing exact directions to prevent unsafe overuse and further trail damage.

    Before you go, check:

    Safety rule of thumb: For any tide-dependent beach, plan to arrive as the tide is going out and leave well before it comes back in. Build in extra time — you don’t want to be scrambling back up a wet cliff trail in the dark.

    Quick safety checklist before heading out:

    • Sturdy, closed-toe shoes with grip (not flip-flops)
    • At least 1 liter of water per person
    • Sunscreen and a hat (no shade at most of these spots)
    • A trash bag for leave-no-trace compliance
    • Let someone know your plan and expected return time
    • Download the tide chart for your specific beach and date

    If you’re planning overnight camping near remote coastal areas, resources like secluded campground guides can help you think through the logistics of remote-site safety more broadly.


    How to actually find solitude at these beaches

    Knowing the beach is half the battle. Showing up at the right time is the other half.

    1. Go on a weekday. Weekend crowds at even the most obscure spots can triple compared to a Tuesday morning. If you can only go on a weekend, aim for Saturday before 8 AM.
    2. Time your arrival around low tide. For Tide Beach Park, Black’s Beach, and Garbage Beach, low tide isn’t just a preference — it’s what makes the beach exist. Check the NOAA tide chart the night before and plan your arrival window.
    3. Arrive before 9 AM. This is the single most reliable crowd-beating tactic across all of these beaches. Parking is easier, the light is better, and you’ll often have the sand to yourself.
    4. Avoid holiday weekends entirely. Memorial Day, Fourth of July, and Labor Day turn even Border Field into a busy spot. If you’re visiting during a holiday week, go on the Tuesday or Wednesday before the weekend.
    5. Skip post-rain days. Runoff from San Diego’s storm drains can affect water quality at beaches near creek mouths. Check the San Diego County beach water quality page before swimming after any significant rain.

    Behavioral habits that keep these spots worth visiting:

    • Pack out everything you pack in. No exceptions.
    • Avoid geotagging exact locations on social media. Seriously — this is how quiet spots stop being quiet.
    • Keep noise low, especially near wildlife areas like Border Field’s estuary.
    • Stay on marked trails and respect any posted closure signs.

    Pro Tip: The Torrey Pines Gliderport lot fills up fast on weekends. If it’s full, park at the Torrey Pines State Beach lot on Torrey Pines Road and walk north along the beach at low tide instead. It’s a longer walk but genuinely beautiful.


    Socalsights insider notes: local extras you won’t find on a sign

    Here at Socalsights, we’ve spent a lot of time on these stretches of sand, and a few things don’t make it into the official guides.

    • Watch hang gliders at Torrey Pines, then descend to Black’s at low tide. The Gliderport is free to watch from, and the combination of paragliders overhead and the wild beach below is one of the most uniquely San Diego experiences you can have. Time it for a morning low tide and you get both.
    • Tide Beach Park + breakfast in Solana Beach. Do the low-tide tidepool walk first thing, then head up to the Solana Beach village area for coffee and breakfast. The whole morning costs almost nothing.
    • Swami’s at sunrise during winter swell. If there’s a solid south or northwest swell running, the view from the bluff above Swami’s at sunrise is genuinely stunning. You don’t have to surf to appreciate it.
    • Border Field for birding in spring. The Tijuana River estuary behind Border Field is one of the best birding spots in Southern California during spring migration. Bring binoculars.
    • South Ponto for a quiet sunset. The main Ponto lot clears out by late afternoon. South Ponto stays quiet through golden hour, and the sunsets here are legitimately great.
    • La Playa Beach (Point Loma) is a tucked-away bayfront option behind Shelter Island that almost no tourists find. It’s calm, family-friendly, and free.
    • Garbage Beach at a minus tide. A minus tide (below 0.0 feet) exposes reef sections that are normally underwater. That’s when the tidepooling here is genuinely world-class.

    Pro Tip: For reliable early-morning parking at Windansea, try the residential block on Gravilla Street between Nautilus and Forward. It’s a short walk and almost always has space before 8 AM, even on summer weekends.

    For a full list of hidden SoCal spots beyond just beaches, the 100+ SoCal Sights guide is worth bookmarking.


    Why these hidden beaches deserve more than just a visit

    Colorful tide pools on remote San Diego beach

    There’s something that gets lost when a “secret” spot goes viral. The trail erodes faster. The parking fills up. The tide pools get walked on. And the thing that made it worth visiting — the quiet, the wildness, the feeling of discovery — disappears.

    What I love about these beaches isn’t just that they’re beautiful. It’s that they ask something of you. Black’s Beach asks you to plan around the tide and earn the descent. Tide Beach Park asks you to show up at the right hour. Border Field asks you to drive past everything familiar and keep going south. That effort is the filter. It’s what keeps these places worth protecting.

    So go. Explore them. But go quietly, leave no trace, and maybe keep the exact GPS pin off your Instagram story. The best thing you can do for a secret beach is let it stay one.


    Socalsights has a curated guide for your next beach day

    Socalsights

    Planning a quiet beach day in San Diego takes more than a Google search. The Socalsights SoCal adventure guide pulls together GPX-friendly routes, tide windows, parking pins, and local tips for hidden beaches and beyond — all in one place, built by people who actually live here. You get the insider knowledge without the hours of research: which lot fills first, which trail to skip after rain, and which stretch of sand stays exposed at mid-tide. Ready to plan your next daycation? Check out the Socalsights daycation guide and find your next quiet corner of the SoCal coast.


    Sources

  • Bridge to Nowhere Hike: Route, Safety & Permit Guide

    Bridge to Nowhere Hike: Route, Safety & Permit Guide

    The Bridge to Nowhere hike is a roughly 10-mile out-and-back trail through the East Fork of the San Gabriel River canyon in Angeles National Forest, and it’s one of the most rewarding hidden hiking trails in the Los Angeles area — as long as water levels are safe. If there’s been recent rain or it’s spring runoff season, skip it for now. If conditions are dry and flows are low, this is an absolute must-do.

    Quick snapshot:

    • Distance: 9.7–10.1 miles round-trip
    • Elevation gain: ~1,200–1,250 feet
    • Typical time: 4–5 hours
    • River crossings: At least 6 (wet feet guaranteed)
    • Permit/parking: Adventure Pass or America the Beautiful Pass required
    • Difficulty: Moderate to strenuous

    ⚠️ Flash flood warning: An upstream thunderstorm can raise river flows within minutes. Check the NOAA point forecast before you leave home. If rain is forecast anywhere in the watershed, do not attempt the crossings.


    Key Takeaways

    The Bridge to Nowhere hike is a 9.7–10.1 mile out-and-back trail with six river crossings that rewards prepared hikers and punishes those who skip the water-level check.

    Point Details
    Distance and crossings 9.7–10.1 miles round-trip with at least 6 river crossings; wet feet are guaranteed.
    Permit and parking An Adventure Pass ($5/day or $30/year) is required; arrive by 7:00 AM on weekends.
    Best season Late fall (October–November) offers the safest combination of low flows and cool temps.
    Flash flood risk Check the NOAA forecast before every trip; turn back if any rain is forecast in the watershed.
    Leave No Trace Pack out all waste, obey private inholding signs near the bridge, and report trail damage to SGMTB.

    Table of Contents

    What does the Bridge to Nowhere hike cover, mile by mile?

    The East Fork Trail is an out-and-back route that follows the San Gabriel River upstream through a narrow, dramatic canyon to a 1936 concrete arch bridge that was never connected to a road. AllTrails lists the route at approximately 9.7–10.1 miles with around 1,240 feet of elevation gain and an average moving time of 4–5 hours.

    Stat Detail
    Distance 9.7–10.1 miles round-trip
    Elevation gain ~1,200–1,250 feet
    Estimated time 4–5 hours
    Trailhead East Fork Day Use / Camp Bonita Road, Azusa
    Wilderness designation Angeles National Forest
    Trail type Out-and-back

    For maps and GPX files, start with the official U.S. Forest Service East Fork trail page and the AllTrails route page. Both give you downloadable navigation data you can load onto a phone or GPS device before you lose cell service in the canyon.


    Step-by-step route from the trailhead to the bridge

    The trail is mostly straightforward, but the river crossings and a few unsigned junctions can trip you up. Here’s what to expect at each stage:

    • Trailhead to Heaton Flats (0–1.5 miles): Start at the East Fork Day Use parking area off Camp Bonita Road. The first stretch follows a wide, flat path along the river. Heaton Flats is a popular picnic area and a good spot to check your gear before the canyon narrows.
    • Crossings 1–3 (miles 1.5–3.5): The first three river crossings come in quick succession. Depths vary by season but are typically ankle to knee-deep in dry conditions. Unclip your hip belt before every crossing so you can shed your pack fast if you slip.
    • Old roadbed at ~3.5 miles: You’ll notice a wide, flat surface that looks almost like a gravel road. Modern Hiker confirms this is the remnant of the original highway project that was abandoned after the 1938 floods. Following it keeps you on route.
    • Crossings 4–6 and Swan Rock (miles 3.5–4.5): The canyon walls close in here. Swan Rock is a distinctive white formation on the right bank — a good photo waypoint and a reliable landmark. Crossings 4 through 6 can be deeper and faster than the earlier ones, especially after any rain.
    • Laurel Gulch and the ridge climb (miles 4.5–4.8): Just past Laurel Gulch, the trail climbs steeply away from the river. This short but sharp ascent leads to the final approach to the bridge.
    • The bridge (mile ~5): The 1936 arch appears suddenly. It’s a genuinely striking structure sitting in the middle of nowhere, which is exactly the point.

    Pro tip: Watch for posted signs near the bridge. The structure sits on private inholding land within the national forest, and access is a courtesy granted by the landowner, not a guaranteed public right.


    Step-by-step route from the trailhead to the bridge — overview diagram

    How do you get to the trailhead and what permits do you need?

    Getting to the East Fork trailhead is straightforward from the greater Los Angeles area. Take the I-210 to Azusa Avenue (exit 39B), head north through Azusa, and follow East Fork Road (also called San Gabriel Canyon Road) into the canyon. Turn right on Camp Bonita Road and follow it to the East Fork Day Use parking area.

    Parking and permits:

    • An Adventure Pass ($30/year or $5/day) is required for parking in Angeles National Forest. The America the Beautiful Annual Pass ($80/year) also covers day-use parking here.
    • Display your pass on your dashboard — rangers do check, and fines are real.
    • Overnight camping requires a wilderness permit, which you can self-issue at the trailhead register. For any reserved or fee-based overnight sites, check Recreation for current availability and rules.
    • On weekends, the lot fills by 8:00 AM in summer. Arrive by 7:00 AM or earlier. Roadside parking outside the designated area draws tickets.

    The USFS East Fork parking page has current fee information and any temporary closures worth checking before you drive out.


    What gear do you actually need for this hike?

    The multiple stream crossings and exposed canyon sections change the gear calculus compared to a typical day hike. Pack light but pack smart.

    Core essentials:

    • Water: Carry at least 3 liters. There’s no potable water along the route, and the river water requires treatment before drinking.
    • Food: High-calorie snacks for 4–5 hours of moving; a full lunch if you plan to linger at the bridge.
    • Sun protection: The canyon offers shade in sections, but the open stretches get intense, especially in summer. Sunscreen, a hat, and UV-protective layers matter.
    • Headlamp: If you start early or run late, you’ll want one.
    • First aid kit: Include blister care, an elastic bandage for ankle support, and any personal medications.

    Footwear options:

    Option Best for Tradeoff
    Quick-dry trail runners Most hikers; fast crossings Less ankle support
    Rugged trail sandals Warm weather; frequent waders Less foot protection on rocks
    Waterproof hiking boots Cold weather; rocky terrain Stay wet longer after crossings

    The HikingGuy guide recommends quick-dry trail runners for most conditions. Many regulars walk straight through the crossings rather than stopping to change shoes.

    Pro Tip: Wear quick-dry trail runners with vented socks and walk through the crossings without stopping. Changing shoes at every crossing wastes time and actually increases blistering on a 10-mile day.

    Balance and safety gear:

    • Trekking poles make a real difference at the crossings. Plant them upstream and move one point of contact at a time.
    • A dry bag or pack cover protects your phone, wallet, and extra layers.
    • A satellite messenger (Garmin inReach or SPOT) is worth carrying. Cell service disappears in the canyon.

    What are the real safety risks on the East Fork trail?

    The East Fork canyon is beautiful and it can also be genuinely dangerous. HikingGuy’s guide is direct about this: crossing fast-moving water is life-threatening, and several fatal incidents have occurred on this route historically.

    Primary hazards and how to manage them:

    • Flash floods: The canyon’s narrow geometry means an upstream storm can send a wall of water through before you see a cloud overhead. Check the NOAA forecast the morning of your hike. If there’s any precipitation in the forecast for the San Gabriel watershed, turn around.
    • Fast water at crossings: If the water is above your knee, visibly turbid, or moving faster than a brisk walk, do not cross. Wait and reassess, or turn back. No view is worth a swept crossing.
    • Extreme heat: Summer temperatures in the canyon regularly exceed 95°F. Start before 7:00 AM, carry extra water, and know the signs of heat exhaustion.
    • Slippery rocks: River rocks are coated in algae. Move slowly, test each step, and use poles.
    • Poison oak: It lines sections of the trail, especially near the water. Wear long pants or at least know what it looks like.

    If someone is swept:

    Stay calm, do not jump in after them. Throw anything that floats. Move downstream to intercept. Once safe, call 911 or activate your satellite messenger. The nearest assistance point is back at the East Fork Day Use parking area, where rangers are sometimes stationed. Cell service typically returns near the trailhead.


    When is the best time to hike the Bridge to Nowhere trail?

    Season matters more on this hike than almost any other trail near Los Angeles. The crossings that make it memorable are the same ones that make it dangerous at the wrong time of year.

    Season Conditions Recommendation
    Late fall (Oct–Nov) Cooler temps, lower flows Best window overall
    Winter (Dec–Feb) Cold; storms raise flows fast Go only on clear, dry stretches
    Spring (Mar–May) Snowmelt runoff; high water Avoid unless flows are confirmed low
    Summer (Jun–Sep) Hot; lower flows but heat risk Early morning starts only

    AllTrails reviewers consistently recommend late fall through early winter for the best combination of manageable flows and comfortable temperatures. Summer works if you’re out by noon, but the heat is no joke.

    On weekends, the bungee jumping operation at the bridge draws extra crowds. A sunrise weekday start gives you the canyon almost to yourself and avoids the midday heat.


    Trail conditions: who maintains the East Fork and how do you report problems?

    The East Fork canyon is a dynamic environment. Storms regularly wash out sections of trail, shift the river channel, and deposit debris across the path. What you see on a map may not match what’s on the ground after a wet winter.

    The San Gabriel Mountains Trailbuilders (SGMTB) handle much of the volunteer maintenance in this area, working alongside the U.S. Forest Service. They actively encourage hikers to report rock falls, downed trees, and washed-out sections.

    How to report a trail hazard:

    • Note your GPS coordinates or the approximate mile marker.
    • Take photos if it’s safe to do so.
    • Submit the report through the SGMTB contact page or the USFS Angeles National Forest trail page.

    Pro Tip: Check the SGMTB site and the USFS trail page within 48 hours of your planned hike date. After any significant rain event, conditions can change overnight.


    What’s it actually like at the bridge on a weekend?

    The bridge itself is a genuinely cool destination. It’s a 1936 concrete arch that was built as part of a highway project through the San Gabriel Mountains, a project that was abandoned after the 1938 floods destroyed the approach roads. The bridge was simply left there, which is what gives it that eerie, photogenic quality.

    Hikers crossing river by Bridge to Nowhere on weekend

    On weekends, a private commercial bungee jumping operation runs from the bridge. This increases foot traffic significantly and changes the vibe from a quiet wilderness experience to something more like a spectator event.

    Etiquette tips:

    • Respect posted signage. The bridge sits on private inholding land within Angeles National Forest, and public access is a courtesy, not a guaranteed right.
    • Don’t crowd the staging areas when jumpers are active.
    • Share the viewpoints. Groups tend to cluster at the arch, so be patient and give others space.
    • Noise carries in the canyon. Keep it reasonable.

    If you want the bridge to yourself, a weekday visit in late fall is your best bet. Weekends in summer can feel more like a festival than a hike.


    How do you navigate when the trail shifts after a storm?

    The East Fork trail doesn’t always look like the map. Washouts reroute sections, and the river crossings themselves move. A few navigation habits keep you on track.

    Before you leave:

    • Download the route from AllTrails or onX as an offline GPX file. Import it to your phone’s map app or a dedicated GPS device.
    • Save the USFS trail page link and check it the morning of your hike for any posted closures.

    On the trail:

    • The general rule is simple: follow the river upstream. The bridge is at the head of the canyon.
    • When you spot the old roadbed at around 3.5 miles, you’re on track. Modern Hiker’s route description confirms this as a reliable waypoint.
    • When trails split near the water, take the higher option. Low routes near the bank are often washed-out remnants.
    • Conserve phone battery. Put it in airplane mode between navigation checks.

    Pre-hike safety checklist backed by USFS and SAR guidance

    Run through this before you leave the parking lot:

    • [ ] Adventure Pass or America the Beautiful Pass displayed on dashboard
    • [ ] At least 3 liters of water per person
    • [ ] NOAA forecast checked; no rain in the watershed
    • [ ] Offline GPX map downloaded and loaded
    • [ ] Satellite messenger or PLB charged and tested
    • [ ] Trip plan left with someone at home (where you’re going, when you’ll be back)
    • [ ] Trekking poles packed and accessible
    • [ ] Hip belt unclipped before each crossing

    Go/no-go decision at the crossings:

    If the water is above your knee, moving faster than a walking pace, or visibly brown and turbid, do not cross. Turn back and return on a drier day. The USFS East Fork trail page posts condition advisories after major weather events — check it the morning of your hike.


    Why the Bridge to Nowhere is worth doing (and when to choose it)

    The Bridge to Nowhere trail earns its reputation. The 1936 arch sitting in a remote river canyon, accessible only by wading through the San Gabriel River six times, is one of those genuinely surprising places that makes you feel like you’ve found something most people don’t know about. It’s the kind of hidden hiking trail that Los Angeles keeps tucked away in plain sight.

    That said, it’s not for everyone on every day. The crossings require real judgment, not just physical fitness. A moderately fit hiker who respects the water and checks conditions beforehand will have a fantastic day. Someone who shows up after a week of rain and assumes the trail is fine because it’s listed as “moderate” on an app is taking a serious risk.

    The stewardship piece matters too. The bridge sits on private inholding land, and the access hikers enjoy is genuinely a courtesy. Obey posted signs, pack out everything you bring in, and report any trail damage to SGMTB. The East Fork canyon stays accessible because people treat it well.


    Sources

    Use these links to verify current conditions before your hike. The USFS and NOAA pages give you real-time information; the narrative guides provide historical context and route detail.